Flask with Amazon S3 Part II
Setting Up an S3 Bucket
In the fist part of this series, we got our Flask application setup. So, now is a good time to setup an Amazon S3 bucket.
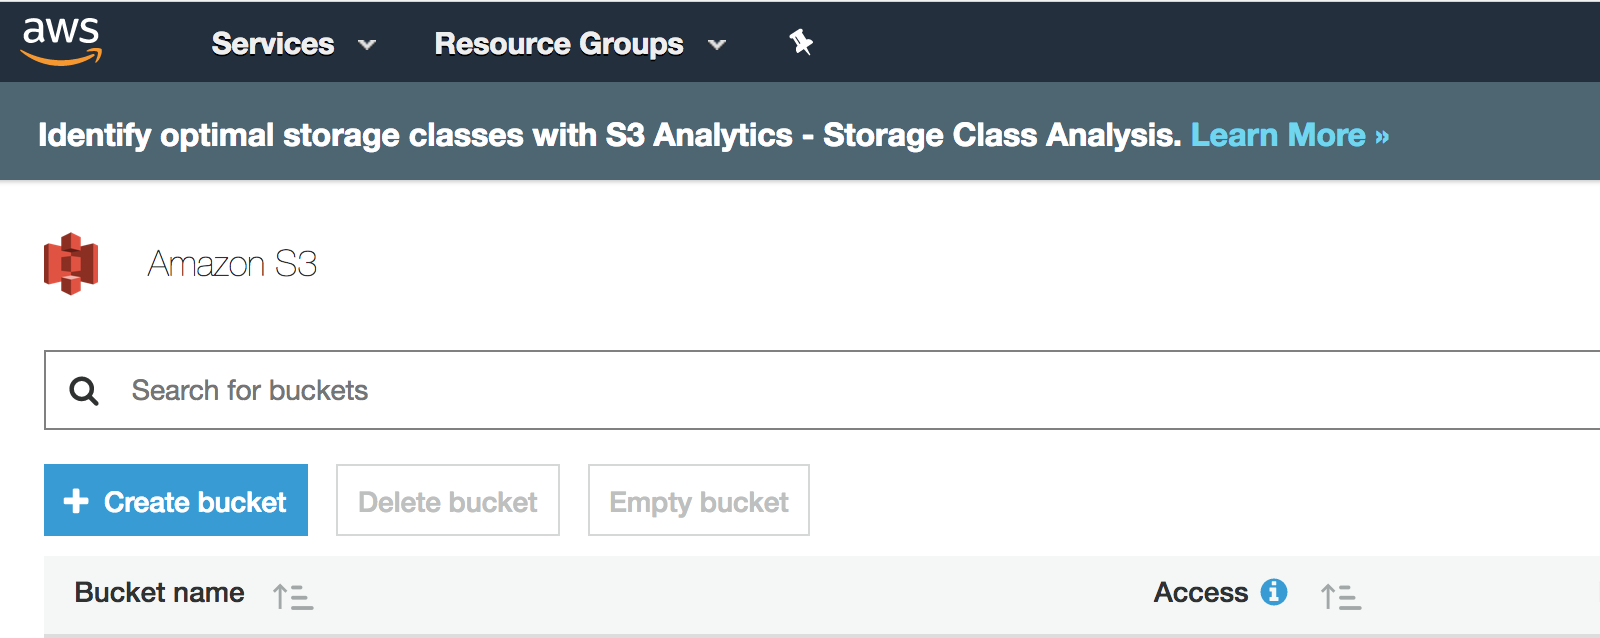
From the AWS Services console, you should see an icon for S3 in the Storage section. Clicking on this will take you to an S3 bucket list page with the option to create a new bucket.

Click the Create bucket button. Enter a bucket name (I’m going to be using “flask-s3-test”). There are some restrictions for bucket naming. It must unique across all bucket names on S3, so yours will be different. S3 Bucket Restrictions and Limitations.
Next, you will need to select your region. A good rule of thumb would be to select a region that’s closest to the bulk of your users. Click Next when finished.
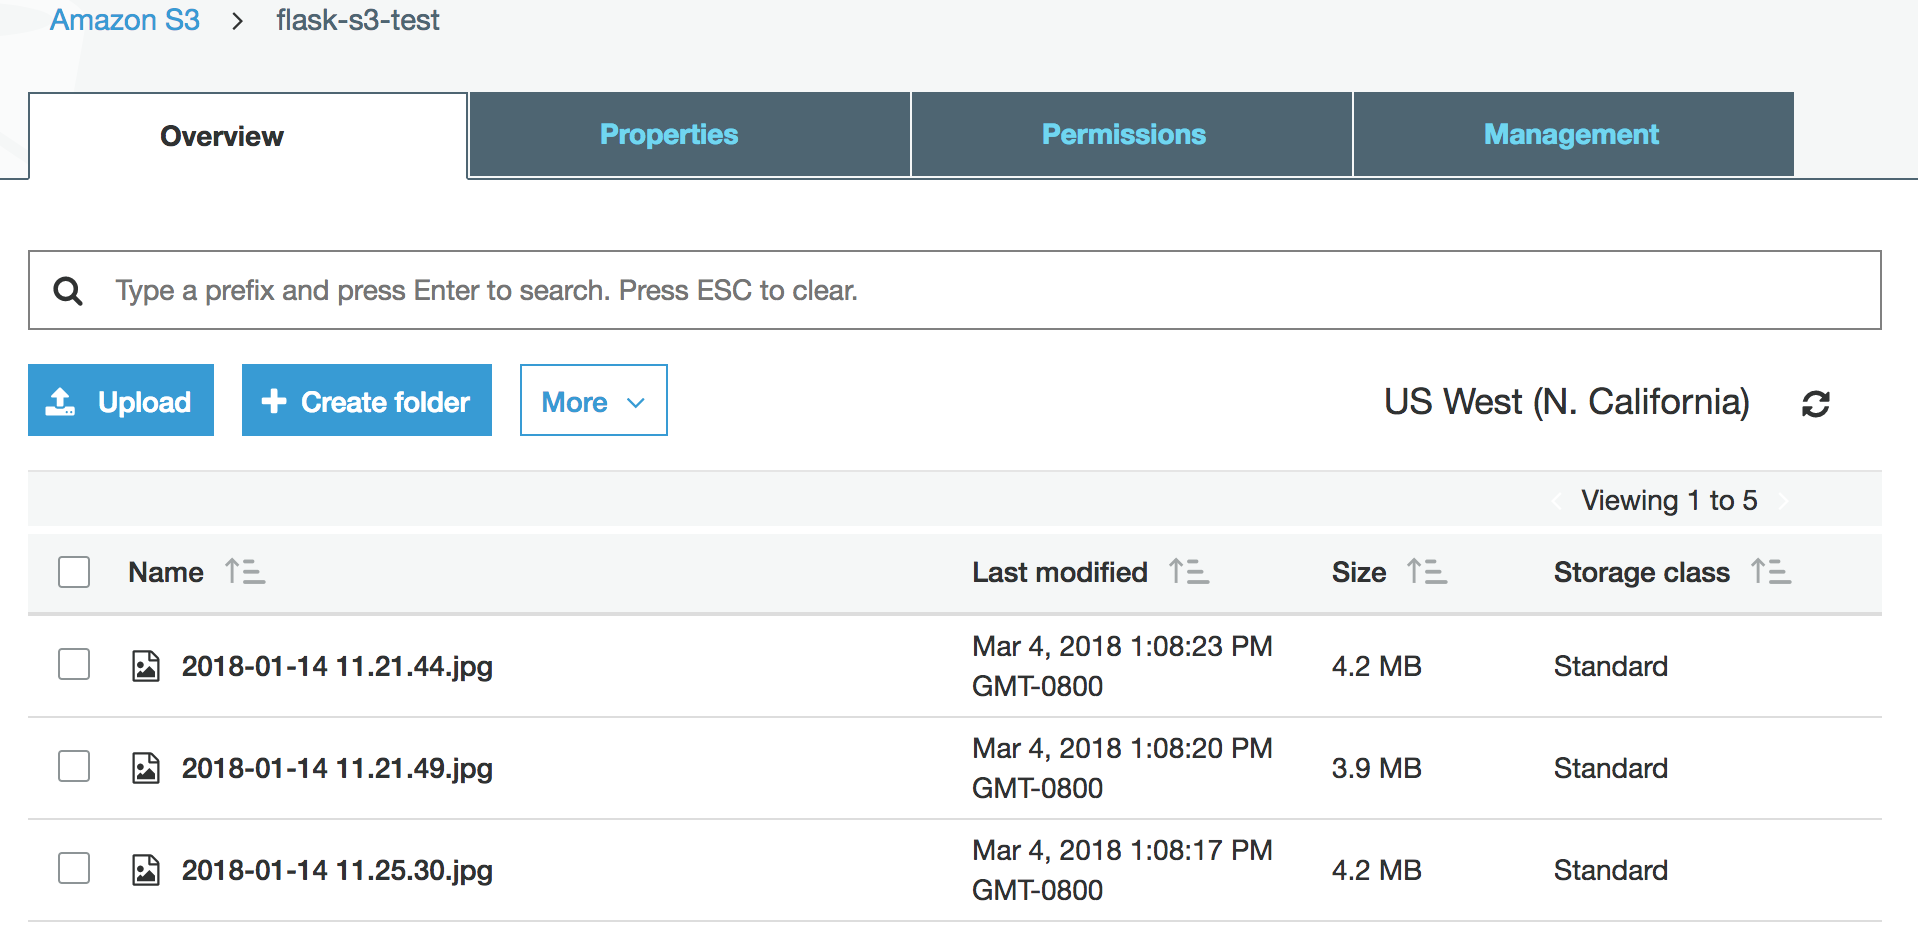
As soon as we return to our Flask app, we will test our connection by reading the files or “S3 Objects” that are in our bucket. I would recommend uploading some files manually. The types of files shouldn’t matter, as a few photos should do the trick.
 Above: several files I manually uploaded.
Now, we can return to our Flask app and install the boto3 package:
pip install boto3
Since the files in our bucket have restricted access, we need to grab an access key and a secret key to setup our configuration. If you have not set up these keys for your account, you’ll need to do this in the IAM section of the AWS Console. More on obtaining access and secret keys.
When we installed boto3, pip also installed botocore as a dependency. This is a much older library in which boto3 provides a nicer interface for. Since botocore is being used under the hood, we can setup our keys using the AWS CLI and botocore will be able to use it.
If you have not previously installed the AWS CLI, you can do this using either pip or Homebrew. If you choose to use pip, be sure you do so using your global version of Python, not the local pip from your virtual environment.
AWS CLI using Homebrew
brew install awscli
AWS CLI using pip
pip install awscli
When this is installed, you can run the command aws configure and the CLI will walk you through the necessary steps in order to fill in a few items including your keys and your region. When finished, your config/credentials will be stored in your home directory:
.aws/
├── config
└── credentials
Configuration Without the AWS CLI
NOTE: Whether using the AWS CLI or not, I would recommend setting up the following .env file for your environment variables.
It is possible to configure AWS without using the AWS CLI. For this, we can setup environment variables. Let’s go ahead and create a new file, .env.
contents of .env
source venv/bin/activate
export FLASK_APP=app.py
export FLASK_DEBUG=1

export S3_BUCKET=<replace with your bucket name>
export S3_KEY=<your key>
export S3_SECRET_ACCESS_KEY=<your secret>
If you’re using a tool like autoenv, this will be especially handy because your environment will be set automatically each time you cd into your project root directory.
In this next step, we will add a new config file to our project root to grab the S3-related environment variables that we set. We will import the os module so we can read our environment variables.
config.py
import os

S3_BUCKET = os.environ.get("S3_BUCKET")
S3_KEY = os.environ.get("S3_KEY")
S3_SECRET = os.environ.get("S3_SECRET_ACCESS_KEY")
We need to return to app.py and add a the following things:
- import the S3 variables set in our config file
- create the S3 client (if not using AWS CLI)
app.py
...
from flask import Flask, render_template
from flask_bootstrap import Bootstrap
import boto3
from config import S3_BUCKET, S3_KEY, S3_SECRET

s3_resource = boto3.resource(
   "s3",
   aws_access_key_id=S3_KEY,
   aws_secret_access_key=S3_SECRET
)

app = Flask(__name__)
Bootstrap(app)
...
We can now add a new “files” route to list our files:
app.py
@app.route("/")
def index():
    return render_template("index.html")


@app.route('/files')
def files():
    s3_resource = boto3.resource('s3')
    my_bucket = s3_resource.Bucket(S3_BUCKET)
    summaries = my_bucket.objects.all()

    return render_template('files.html', my_bucket=my_bucket, files=summaries)
Since boto3 can be use for various AWS products, we need to create a specific resource for S3. With this, we can create a new instance of our Bucket so we can pull a list of the contents. When we call my_bucket.objects.all() it will give us a summary list which we can loop through and get some info about our S3 bucket’s objects.
Object Storage and File Storage
Since S3 is object-based storage, each file will have it’s own unique identifier. Object store, in general, is a scalable way to store tons of unstructured data and media. It generally has better performance and there’s no need to worry about capacity and availability.
In our files route, we are rendering a files.html template which we haven’t created yet. So, let’s do that now:
templates/files.html
{% extends "bootstrap/base.html" %}
{% block html_attribs %} lang="en"{% endblock %}
{% block title %}S3 Object List{% endblock %}

{% block navbar %}
<div class="navbar navbar-fixed-top">
  <!-- ... -->
</div>
{% endblock %}

{% block content %}
  <div class="container">
    <div class="col-12-xs">
      <h3>Bucket Info</h3>
      <p>Created: {{ my_bucket.creation_date }}</p>

      <hr>
      {% for f in files %}
      {{ f.key }}<br>
      {{ f.last_modified }}<hr>
      {% endfor %}

    </div>
  </div>
{% endblock %}
As with our index template, we’re extending a base Bootstrap template given to us by Flask Bootstrap. In addition, we’ve also added {% block html_attribs %} lang="en"{% endblock %}, which allows us to extend our opening html tag. We have added the lang attribute, giving us the following output:
<html lang="en">
If you manually uploaded files to this bucket, you should see list of each file. The “key” should be equivalent to the file name, and the last time it was modified should be displayed as well. We are handling this using a for loop within our Jinja2 template. Since we have Bootstrap configured, we can improve this using a Bootstrap table which has some CSS styling. Not to mention adding a couple more columns later with some useful info.
templates/files.html
...

{% block content %}
  <div class="container">
    <div class="col-12-xs">
      <h3>Bucket Info</h3>
      <p>Created: {{ my_bucket.creation_date }}</p>

      <hr>
      <table class="table table-striped">
        <tr>
          <th>Filename</th>
          <th>Last Modified</th>
        </tr>
        {% for f in files %}
        <tr>
          <td>{{ f.key }}</td>
          <td>{{ f.last_modified }}</td>
        </tr>
        {% endfor %}
      </table>

    </div>
  </div>
{% endblock %}
Jinja2 Filters
If you refresh the page in the browser, you’ll notice that the dates that are being printed are appear something like 2018-03-04 21:08:23+00:00. We can use a filter along with a popular datetime library called arrow to make this more human readable. Let’s use pip to install arrow.
pip install arrow
Next, let’s create a new file for our filters, filters.py, in our project root.
touch filters.py
In our new filters file, we’ll define a new function, datetimeformat. The dates given to us from the boto3 S3 client will be in a string format. Arrow will do some magic and output a nice human-readable format, such as “an hour ago” or “a week ago”.
filters.py
import arrow


def datetimeformat(date_str):
    dt = arrow.get(date_str)
    return dt.humanize()
To use our filter, we need to return back to app.py and import them. We will also need to register our new filter by adding it to the app.jinja_env.filters dictionary. Once we do this, it will be usable from within our Jinja2 templates.
app.py
...
from filters import datetimeformat
...

app = Flask(__name__)
Bootstrap(app)
app.jinja_env.filters['datetimeformat'] = datetimeformat
Let’s return to our files template, files.html, and apply the datetimeformat filter for the bucket creation date and for the last time each bucket object was modified.
templates/files.html
{% block content %}
  <div class="container">
    <div class="col-12-xs">
      <h3>Bucket Info</h3>
      <p>Created: {{ my_bucket.creation_date | datetimeformat }}</p>

      <hr>
      <table class="table table-striped">
        <tr>
          <th>Filename</th>
          <th>Last Modified</th>
        </tr>
        {% for f in files %}
        <tr>
          <td>{{ f.key }}</td>
          <td>{{ f.last_modified | datetimeformat }}</td>
        </tr>
        {% endfor %}
      </table>

    </div>
  </div>
{% endblock %}
If you refresh the files page, the dates should now reflect dates that are more presentable. However, we have a table that only consists of two columns. We can add a couple more columns with useful info. Let’s create a new column for file type.
To get the file type, we’ll need to create a new filter. Returning to our filters.py file, we need to import os and mimetypes. We will create a new function, file_type, passing in our key, which, if you remember, is the file name from the S3 object. Since we don’t have the actual file on our file system, we can inspect the file. Instead, we will need to rely on the file extension.
filters.py
import os
import mimetypes

...

def file_type(key):
    file_info = os.path.splitext(key)
    file_extension = file_info[1]
    try:
        return mimetypes.types_map[file_extension]
    except KeyError():
        return 'Unknown'
Above: when we set the file_info variable using the splitext method, the os module will return a tuple with the file name being the first item, and the file extension being the second item (having an index of 1). The mimetypes module should have a map of the file extension. If not, it will result in an error, which we will set as ‘Unknown’.
Similar to the datetimeformat, we will need to register the file_info filter:
app.py
...
from filters import datetimeformat, file_type

...

app.jinja_env.filters['datetimeformat'] = datetimeformat
app.jinja_env.filters['file_type'] = file_type
Within our files template, we will go ahead and our new column. When looping through the list of files, we will use the “key” for the third column also, piping it to our file_type template. This should return us a value like image/jpeg.
templates/files.html
{% block content %}
  <div class="container">
    <div class="col-12-xs">
      <h3>Bucket Info</h3>
      <p>Created: {{ my_bucket.creation_date | datetimeformat }}</p>

      <hr>
      <table class="table table-striped">
        <tr>
          <th>Filename</th>
          <th>Last Modified</th>
          <th>Type</th>
        </tr>
        {% for f in files %}
        <tr>
          <td>{{ f.key }}</td>
          <td>{{ f.last_modified | datetimeformat }}</td>
          <td>{{ f.key | file_type }}</td>
        </tr>
        {% endfor %}
      </table>
    </div>
  </div>
{% endblock %}
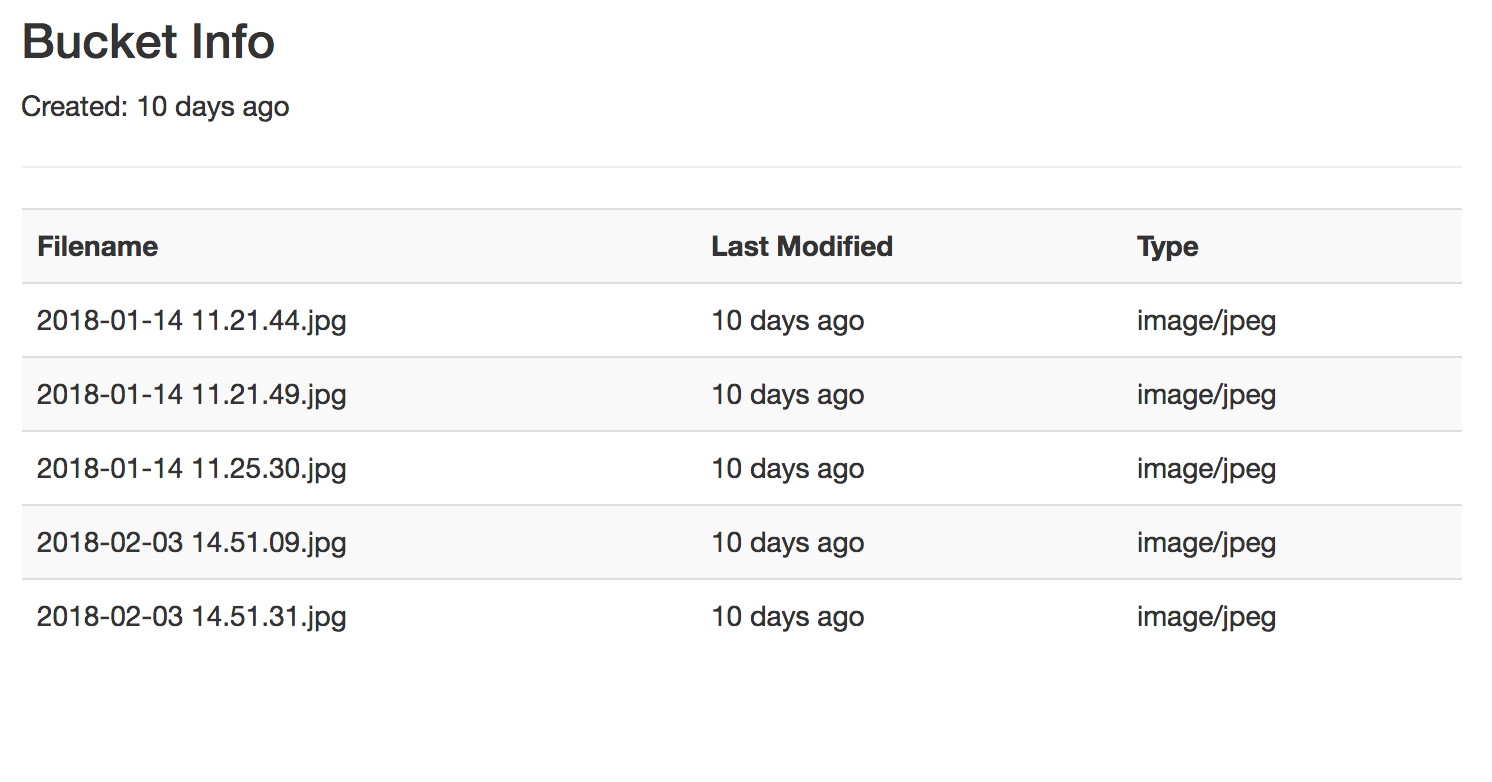
Output of our table:
 Now that we have a page that displays the contents of our bucket, it would be nice if we could upload and download files from our web interface. We’ll handle that in the next post.