Insomnia REST Client Intro
REST Clients have long been a part of a software developer’s toolset. In a nutshell, they are a shortcut for testing and debugging API’s. Popular clients have consisted of browser extensions as well as desktop applications. In this post, I’ll will be covering Insomnia, a cross-platform REST Client which is packed full of great features. Making basic requests (i.e. GET, POST) is merely the tip of the iceberg.
If you don’t have Insomnia installed, you can access it here.
Creating HTTP Requests
For starters, making simple, straightforward HTTP requests are generally what REST clients are known for. For demonstrating some HTTP requests, we’ll cover some examples using httpbin.org, which is an online HTTP request/response service.
GET Requests
After opening the application, we will start by creating a new request. You can use the shortcut ⌘N, or just click the “New Request” button. All that’s needed for the next step is to enter a name and a request method. Then, hit “Create”.
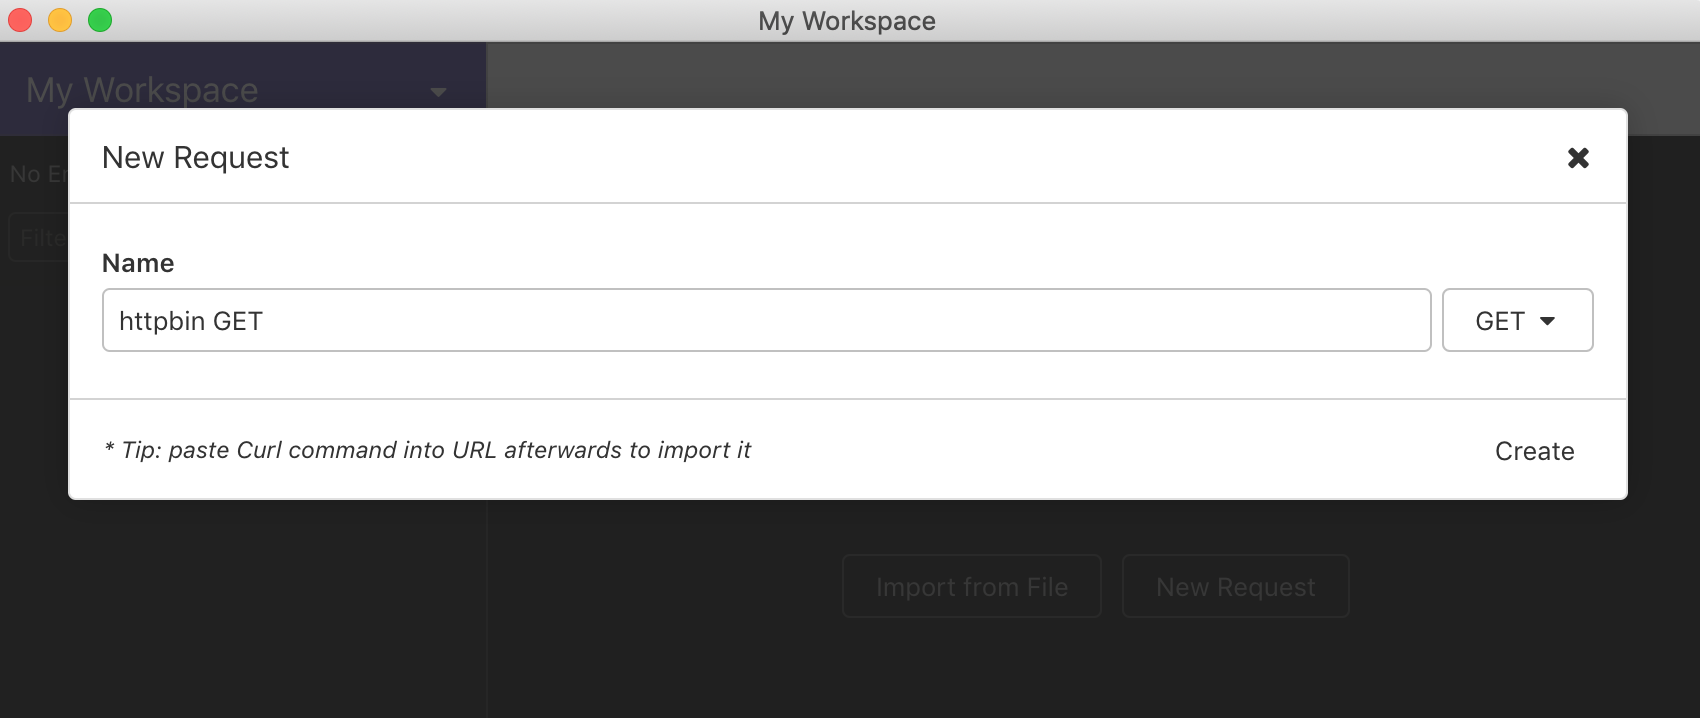
Notice that each time a new request is entered, you will see it populate in a list in the left column of the window. You can also have multiple workspaces to group your requests together.
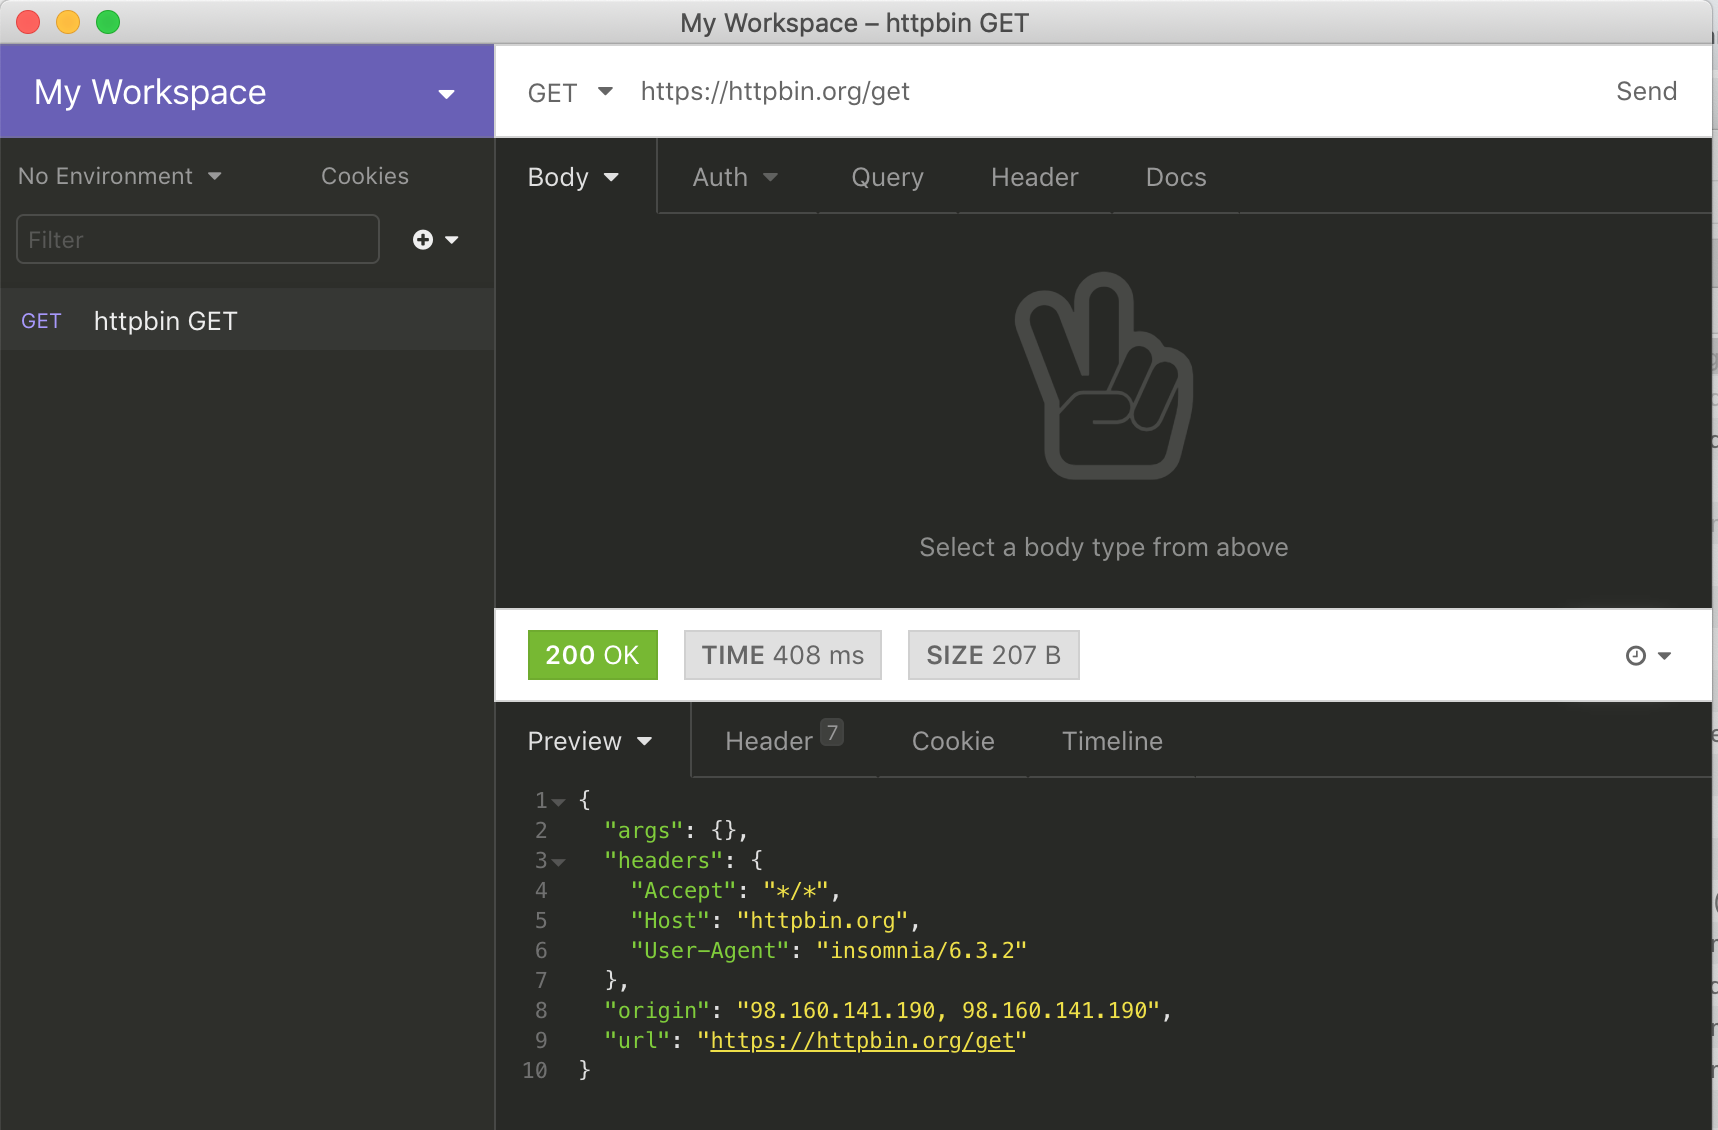 After adding the URL, then clicking “Send”, a preview of the response will be displayed in a split window. It will automatically be pretty-printed to make JSON easy to read.
Clicking on the Query tab will allow adding query parameters. You can append the params to the URL, but using the tab will make it much easier to read and modify. Another added benefit is the ability to toggle invididual parameters on and off.
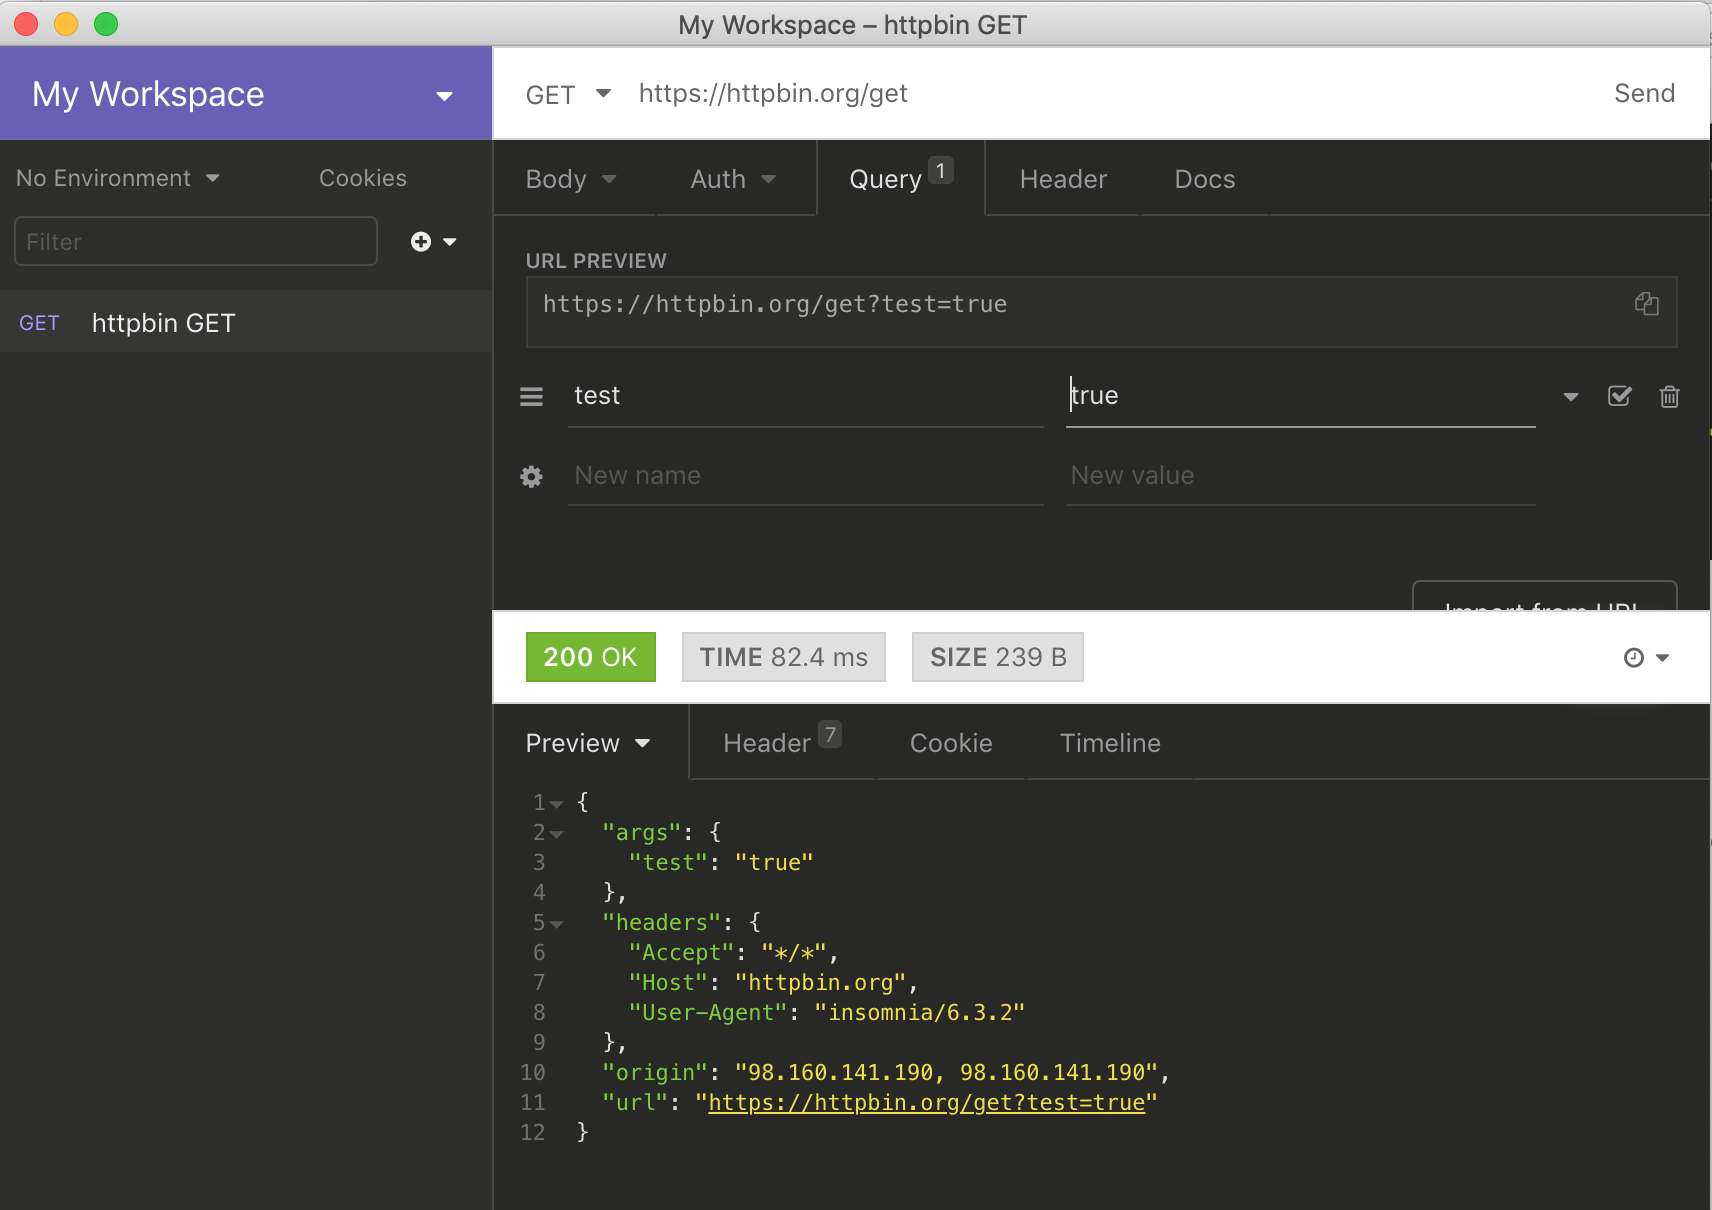 Above: a GET request with a single query parameter. Httpbin will return any GET params as part of the response in an “args” object.
Post Requests
Insomnia is also great for posting data. We will cover 2 ways of posting data: 1) using multipart form data, and 2) using a JSON payload.
After choosing which POST method to use, you can click the dropdown next to the “Body” tab. We will begin by selecting “Multipart Form”.
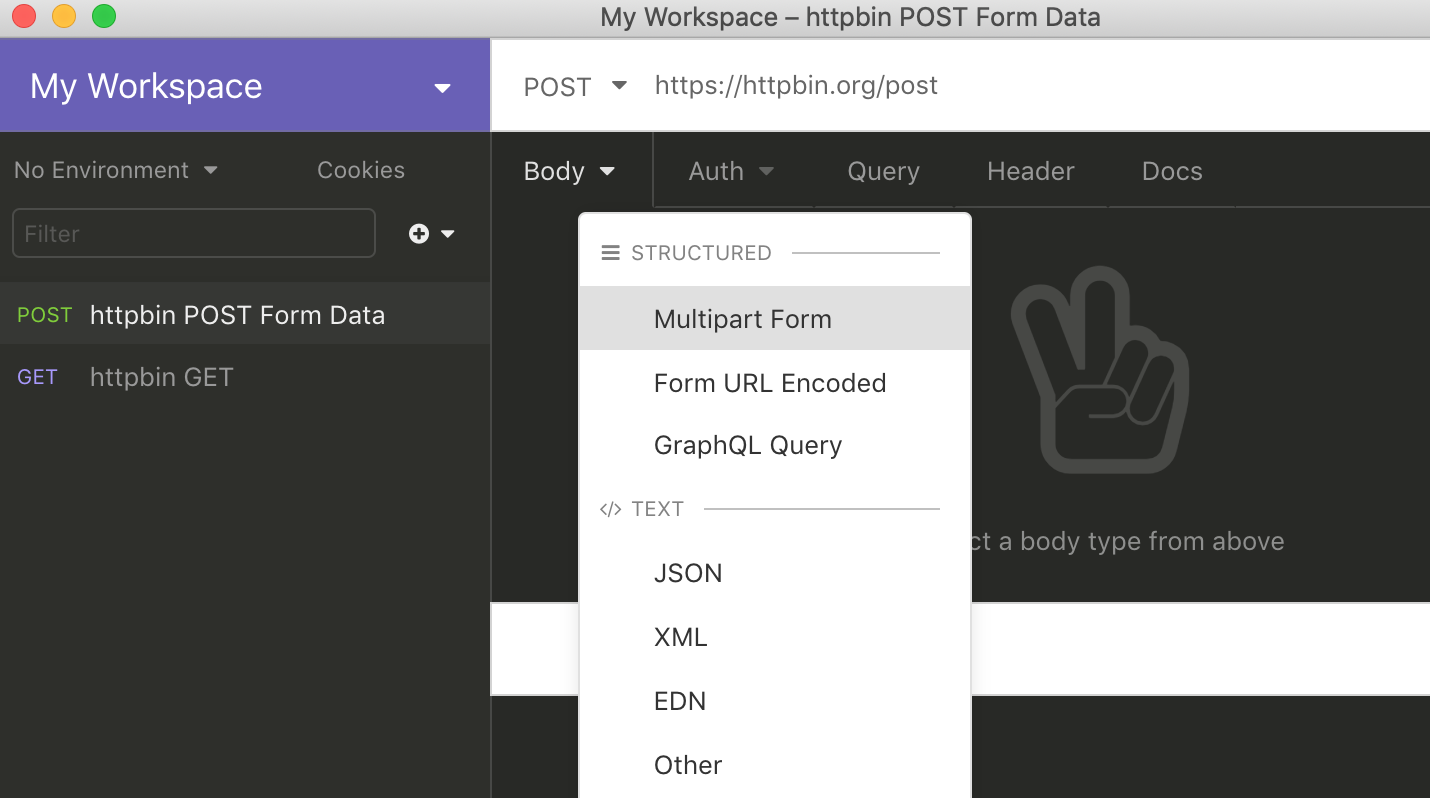
In the next step, we’re going to add some form data. Then, click “Send”.
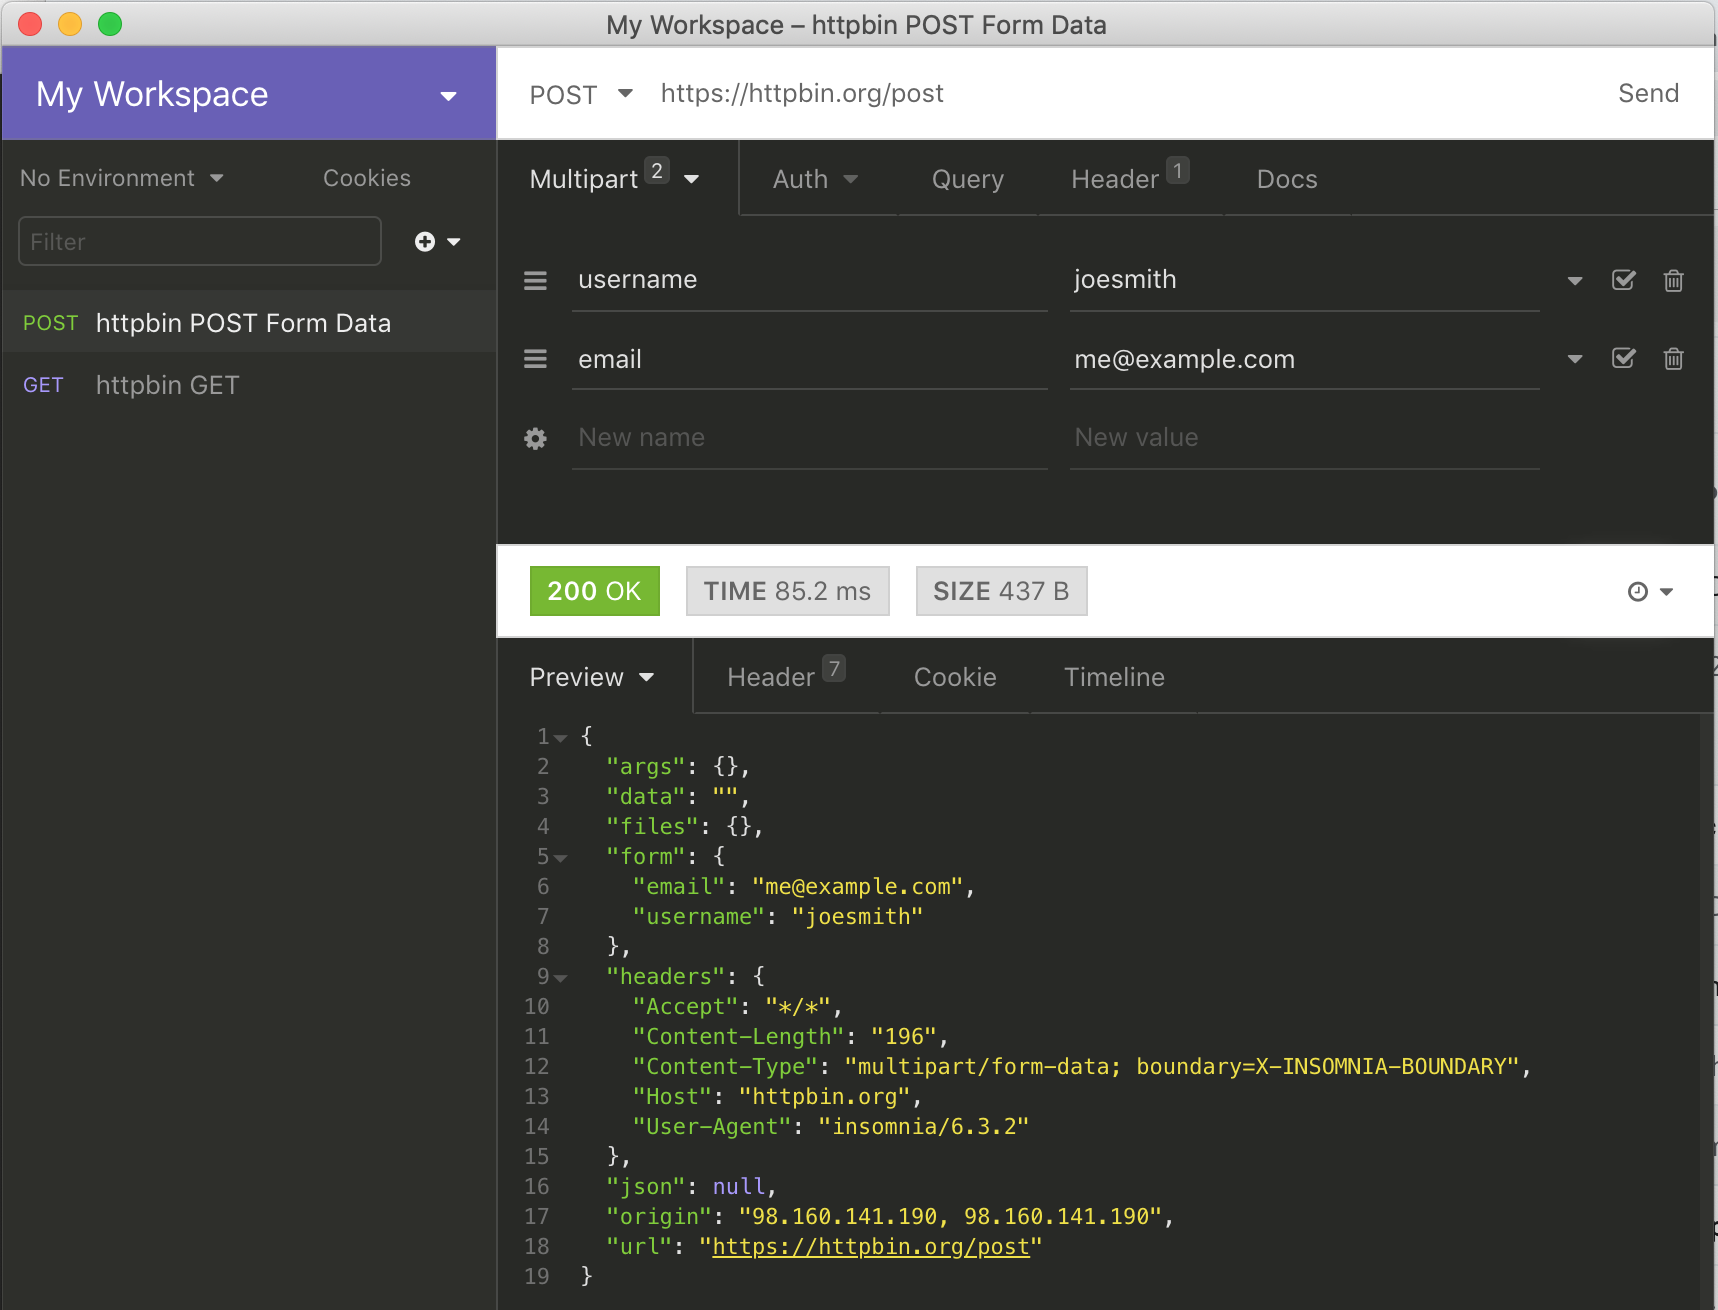
Again, httpbin.org will post our data back to use inside the response. This time, the data is in the “form” object.
The next POST example will consist of sending a JSON payload. Before we start, however, Insomnia has a nice “duplicate” feature. Since we’re really only changing one thing, we just as well take advantage of this:
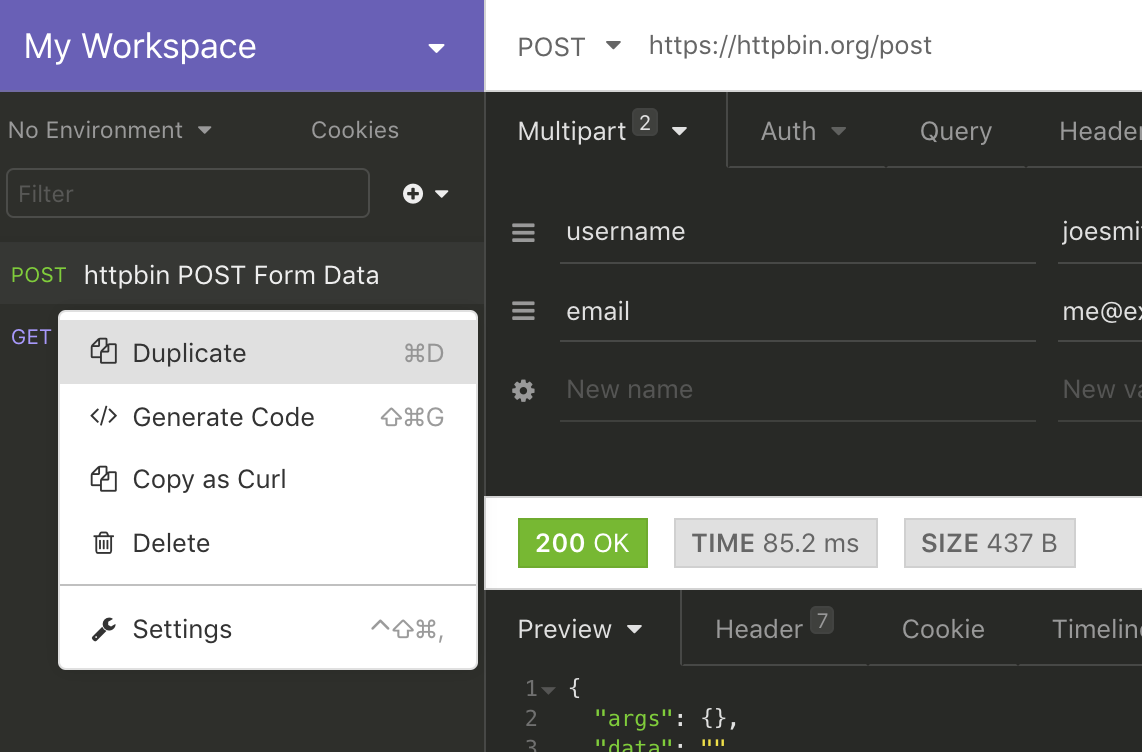
The name of the duplicate will be “httpbin POST Form Data (copy)”. Renaming the duplicate is as simple as double-clicking it. We will also need to switch the “Body” dropdown to “JSON”:
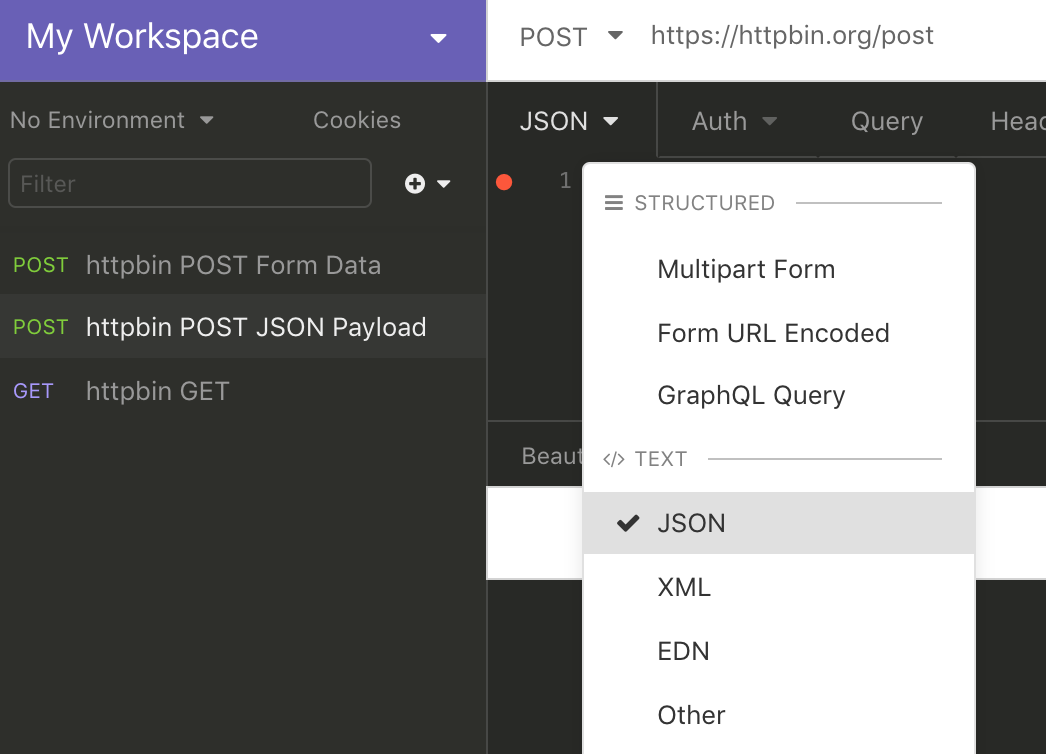
Whenever this is switched, keep in mind that any POST data that was saved will be lost. In the top of the split window, you can now enter a JSON object. We will use the same data as the for POST:
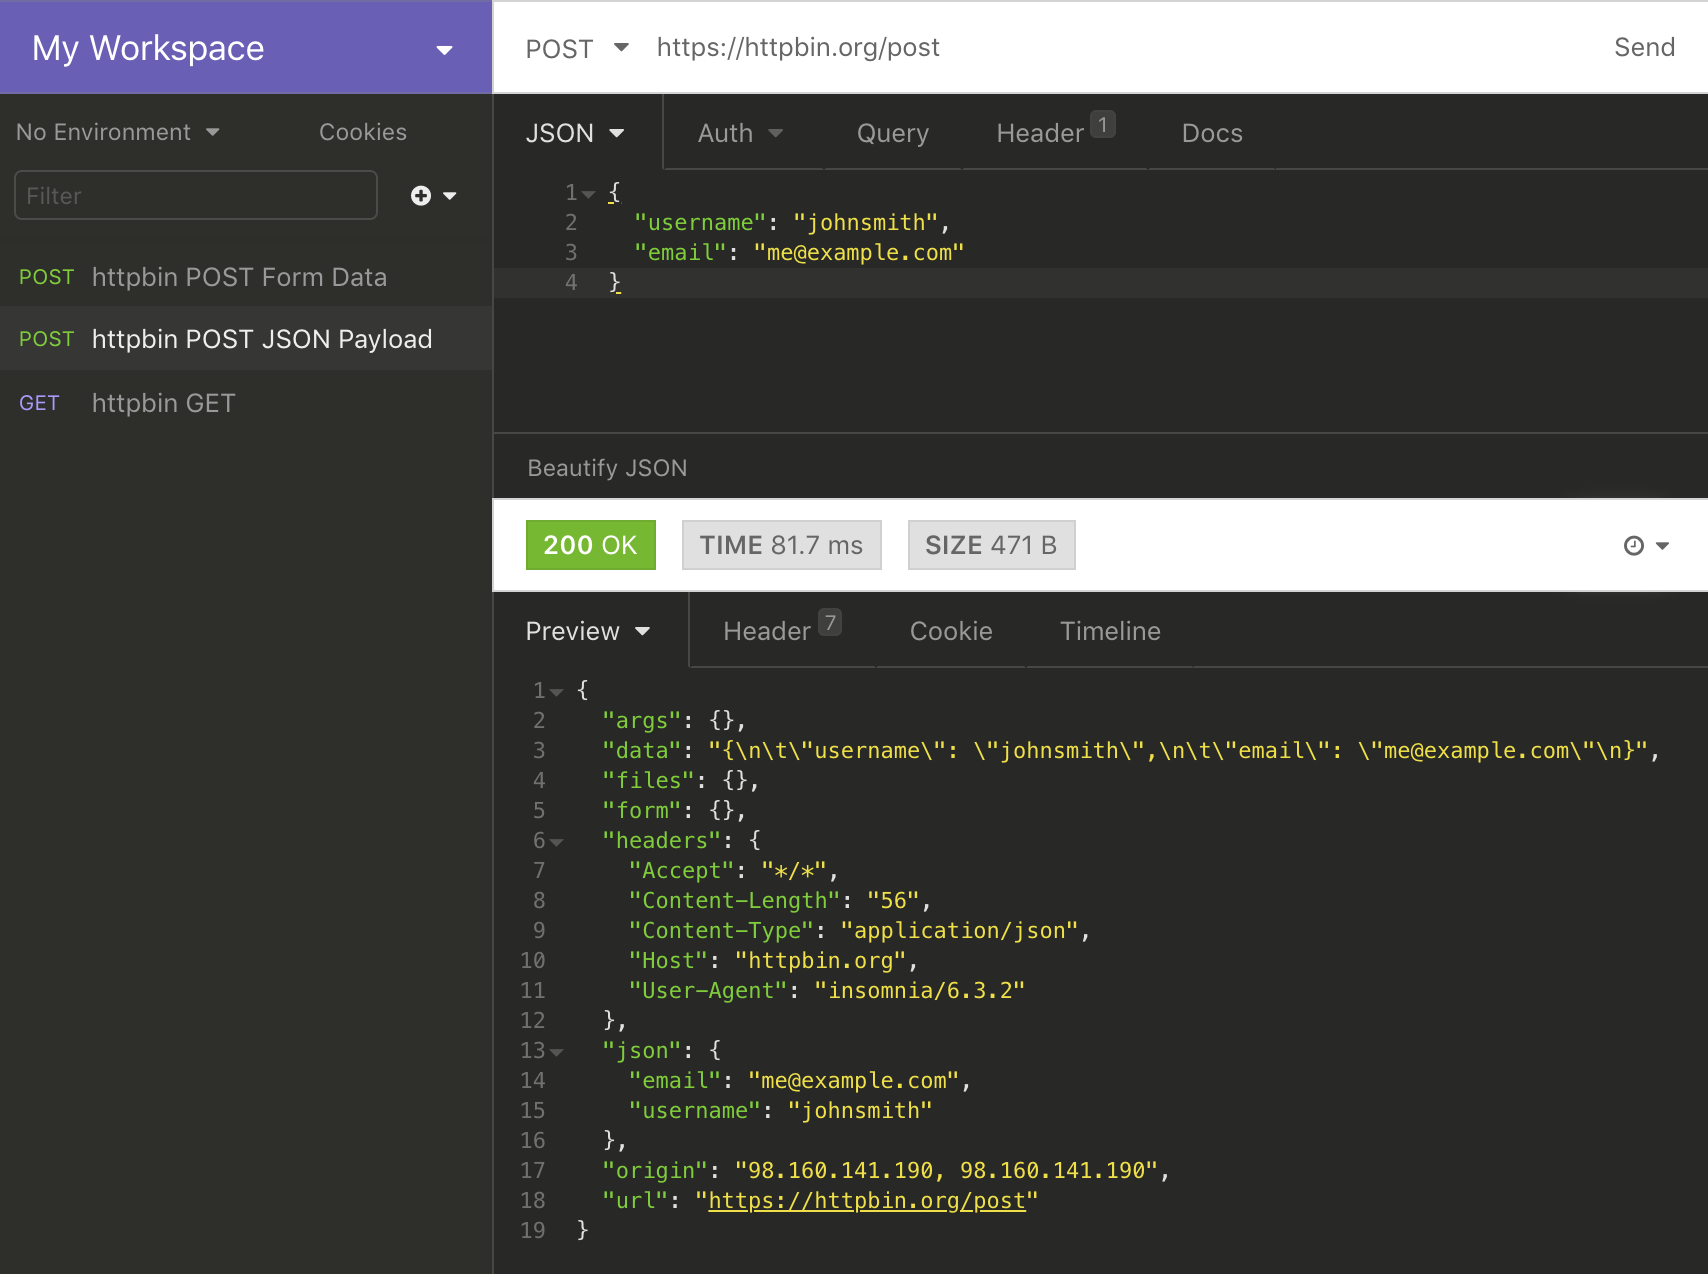
Insomnia also has a built-in JSON validator to make sure you’ve entered valid JSON. For example, if we remove the comma after the username, we will be shown the following error:
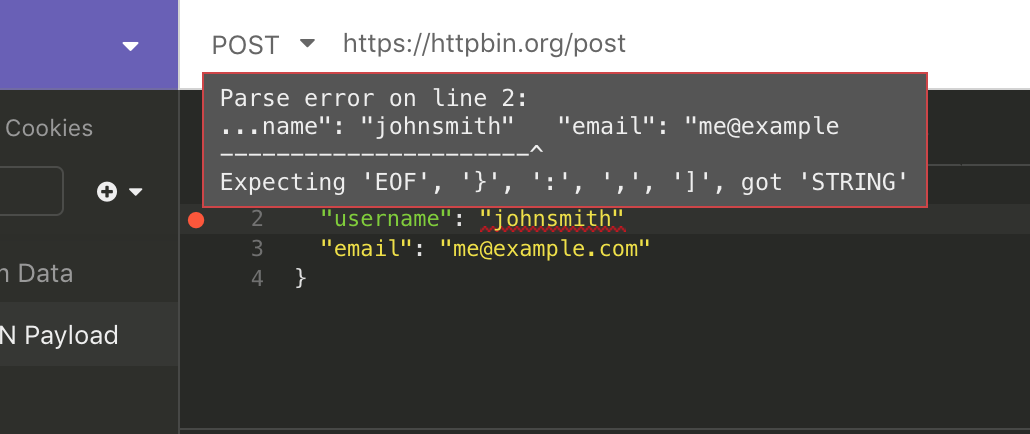 These are just some of the powerful features Insomnia REST client has. In the next part, we will look at JSONpath to inspect data in the preview window. This is especially handy for API responses containing an overwhelming amount of data.
Using JSONpath to Filter Results
JSONpath is a very nice tool for evaluating API responses. In this example, we will pull a list of countries from the World Bank. Within our workspace, let’s setup a new GET request using this URL: http://api.worldbank.org/countries?format=json. The API will return to us a list of countries.
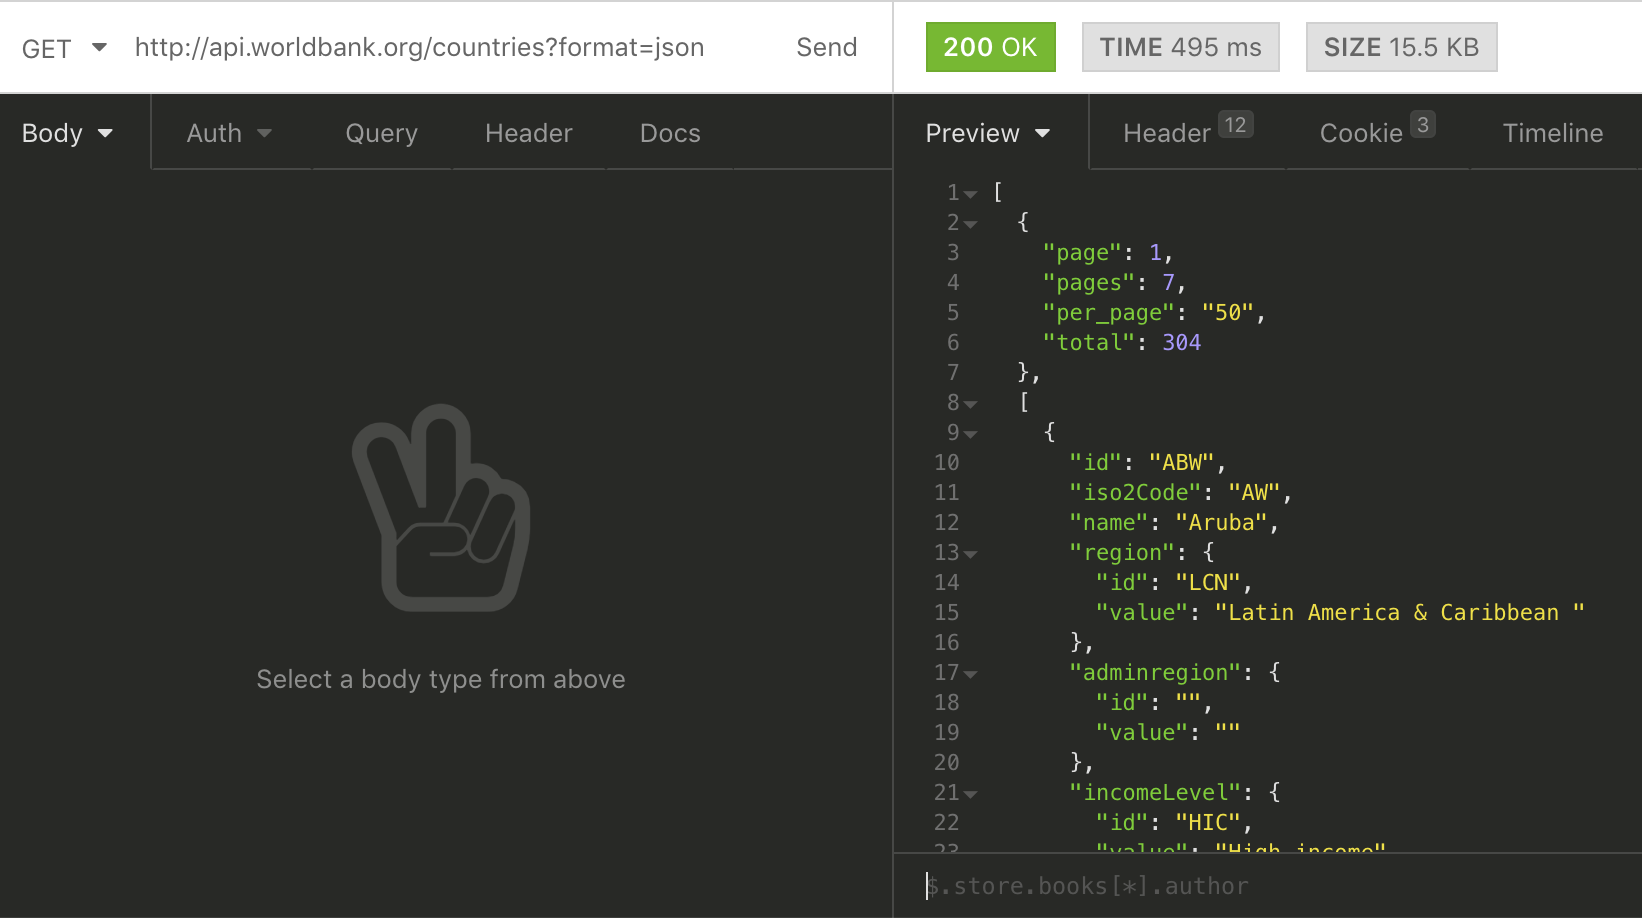
At the bottom-right, you will see an input field with the placeholder $.store.books[*].author. It is in this field where you can enter your JSONpath expression.
The API repsonse consists of an array with the first item being an meta data object and the second being another array of countries. Before we start filtering some data, you can find a concise JSONpath reference here. The $ symbol represents the root element. So, our expressions will begin with a $.
If we just want to extract the metadata by itself, we will need to grab the first item in the array. This is very simple. The expression $[0] will do the trick:
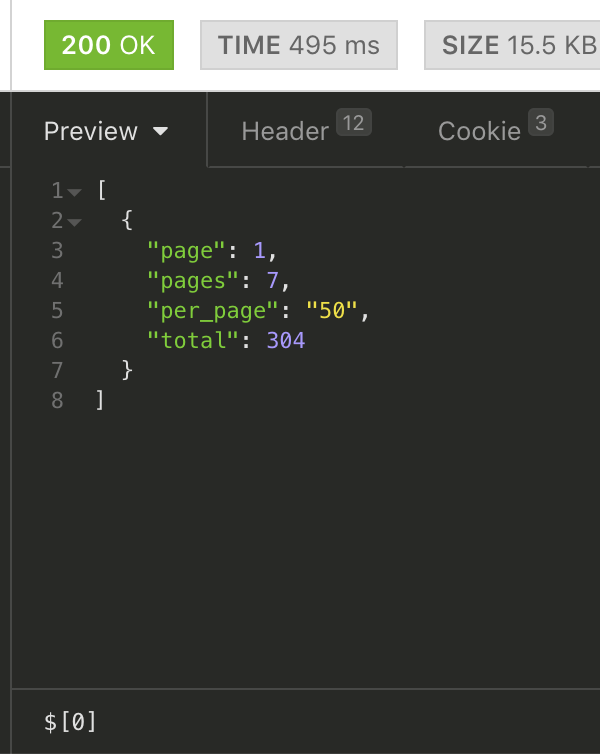 As you can see from above, all we needed was to get the first item in the array because the array was our root element. That being said, the list of countries is much more interesting.
An expression of $[1] will give us the full list of countries from this API request (note: the results are paginated so the length of the full list will be 50). If we just want the first country we can get the first item in the countries array. Since we have a nested array, we will need to go through the root element first. The following expression will handle our case:
$[1][0]
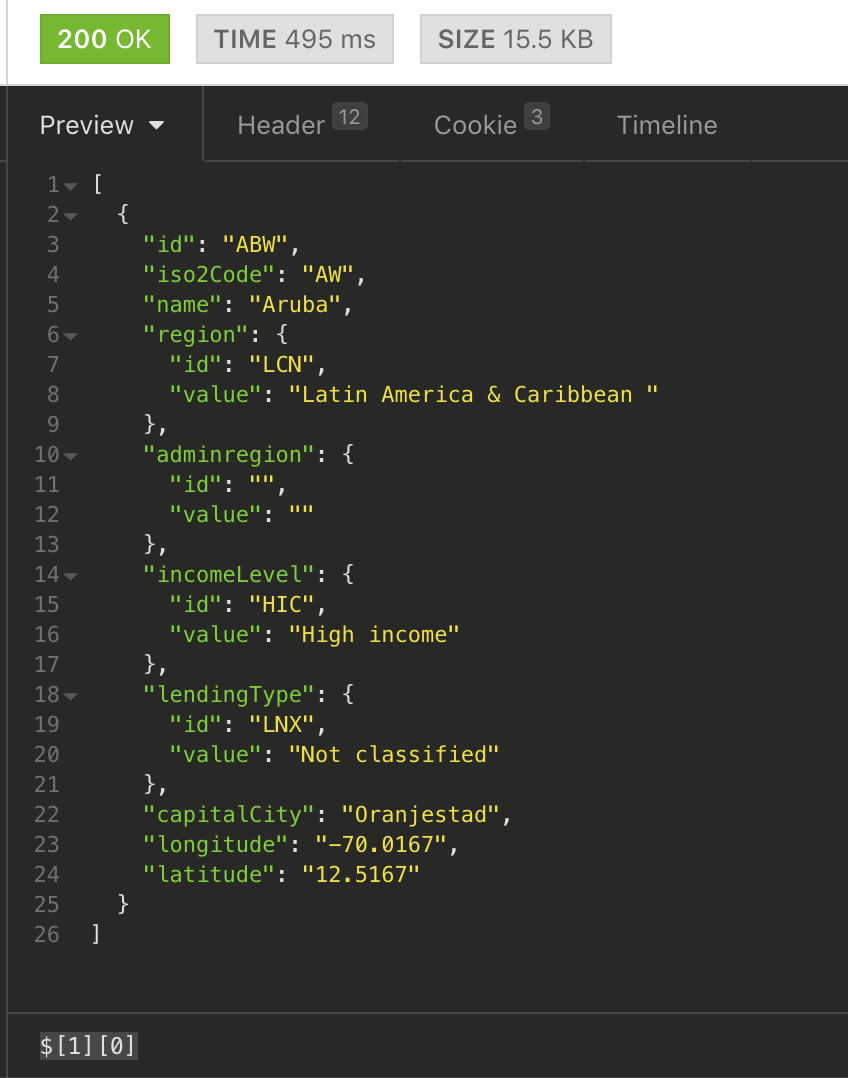
JSONpath also has some elegant solutions for getting ranges. You can use the colon operator : to select a range of countries by index. Grabbing the first 3 elements can be done with this expression:
$[1][0:3]
Let’s say we only want the first and third elements. The comma , is available as a union operator:
First and thid elements:
$[1][0,2]
We also know there are 50 countries in our response. If we were not given a count, we would still be able to find the last country in the list. Using the @ operator, we can reference the current element. We can subtract 1 from the length property of the coutries array. This will enable us to exract just the last country, which in our case, is China:
$[1][(@.length-1)]
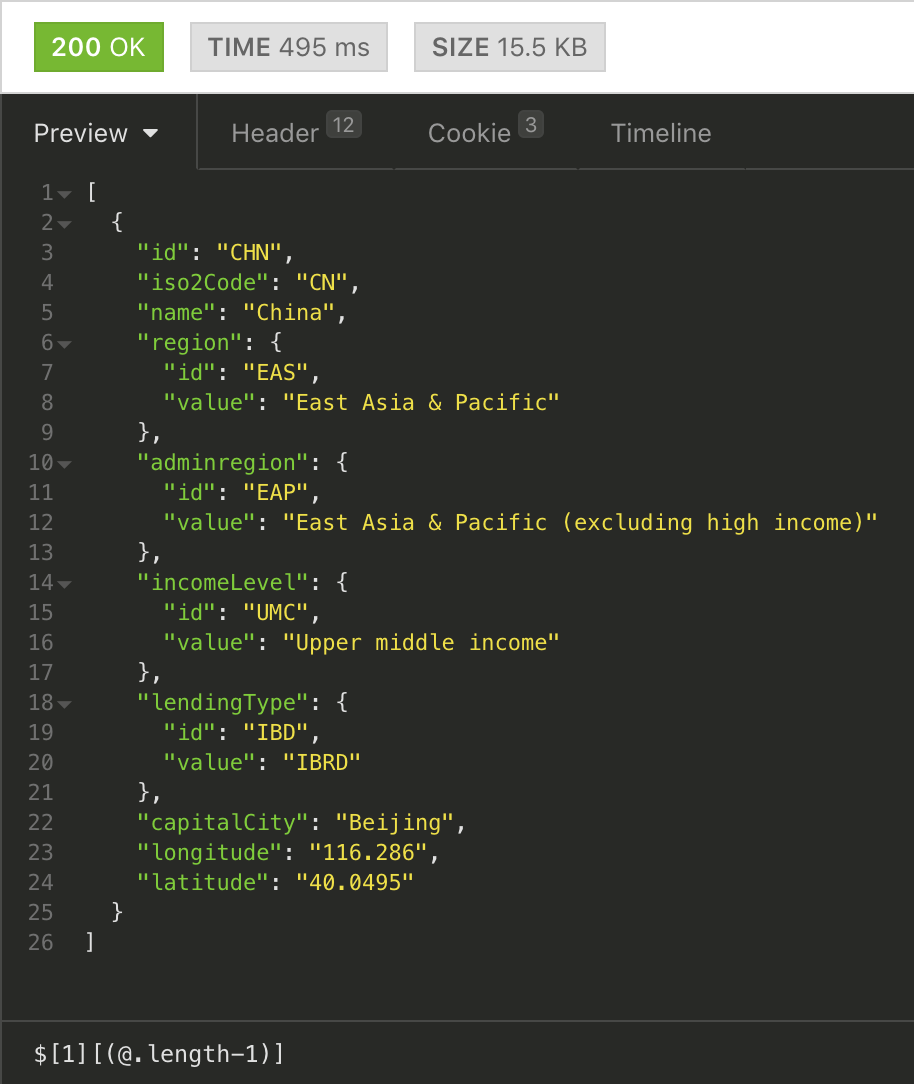 Above: the parentheses are needed to express that its contents are a script expression, allowing us to use the length property and subtract 1.
For the next example, let’s grab only a list of country names. As you can see from the previous examples, each country is an object that contains data which includes things like income, location, and the capital city (in addition to the name). We can use the asterisk wildcard operator * to get the name property of every item in the list:
$[1].*.name
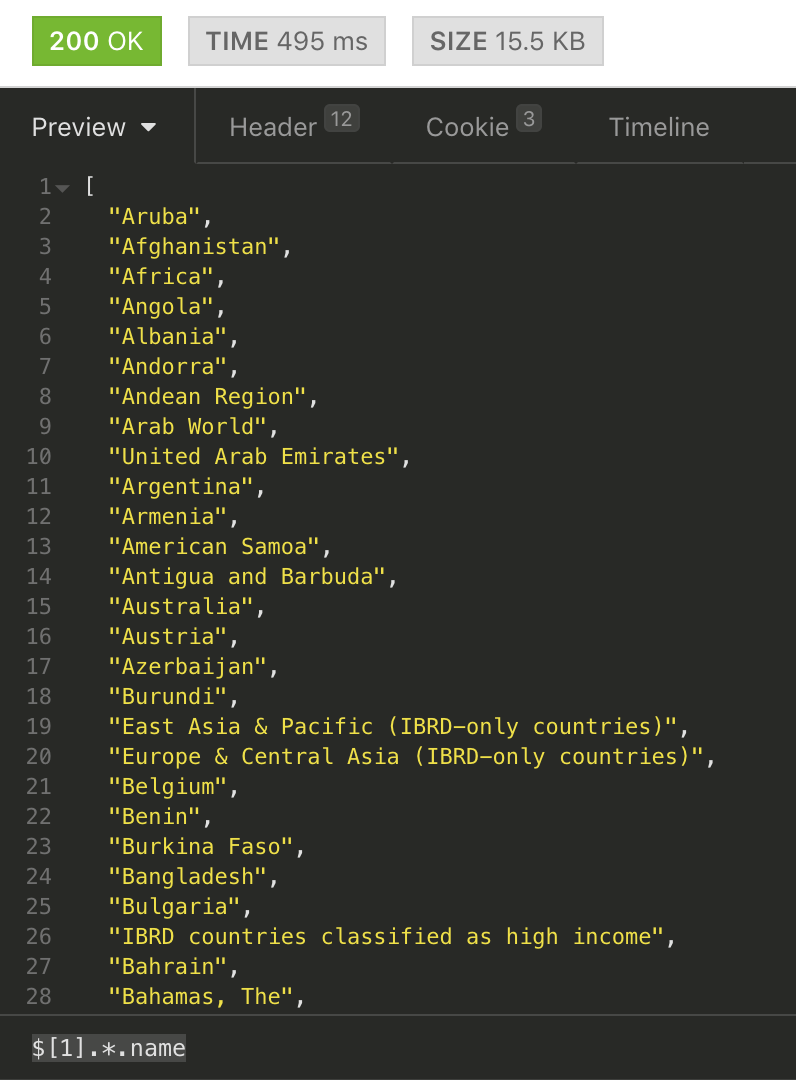 One thing you’ll also notice from the list above is that not every result is a country. Some of these are regions, such as “East Asia & Pacific…”. If we want to filter these out, leaving just the names of actual countries, that is also possible with JSONpath. To accomplish this, we need to swap out our wildcard with a filter expression. A filter expression will consist of the following syntax:
?(<boolean expr>)
Previously, we had $[1].*.name. We used the asterisk wildcard assuming that each item in the list was a country. Since this is not the case, we need to find something that’s different between countries and regions in the results. From inspecting the raw data, since regions do not capital cities, the capitalCity property is an empty string. So, this is what we will use for our filter expression:
$[1][?(@.capitalCity != '')].name
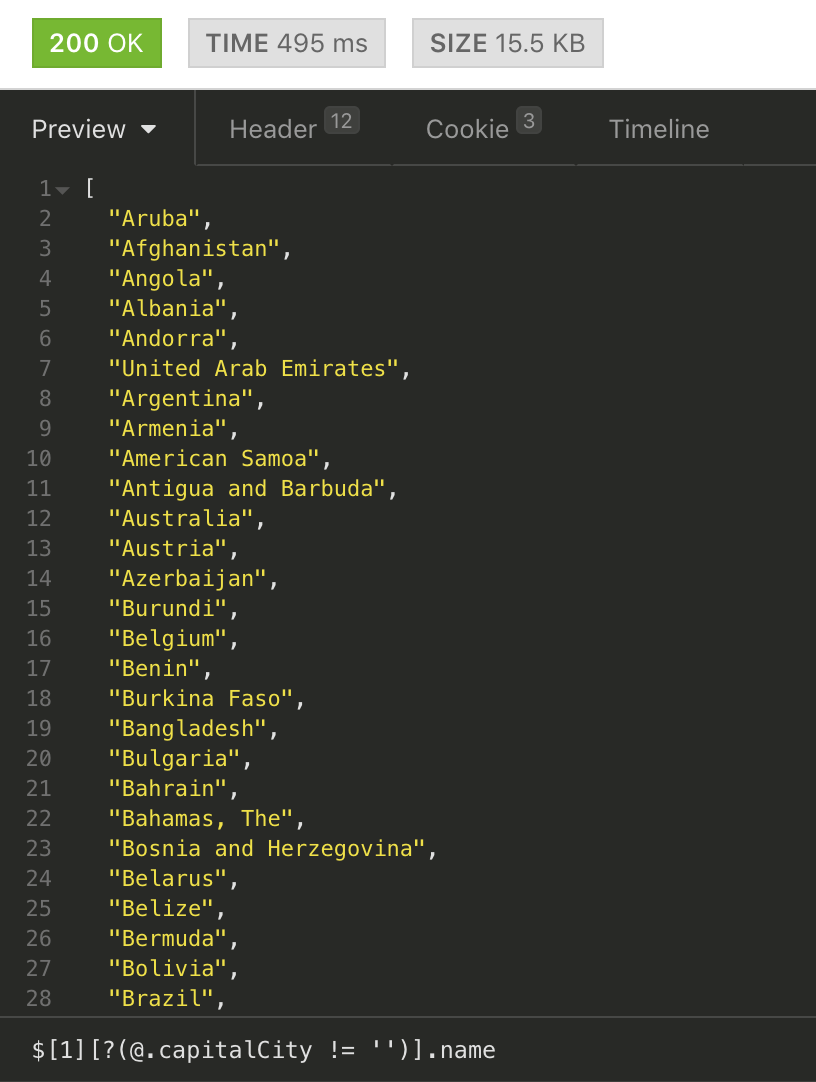
Having JSONpath available is incredibly valueable for inspecting and filtering data. Another powerful feature of Insomnia is the ability to use variables; which is what we’ll cover next.
Using Variables
Within a single workspace, you can setup variables which will help you become more productive. A workspace will generally have a collection of API calls that have many similarities. Perhaps they all share the same domain name. Or, each API call may use the same API key. There are a myraid of things you can do with this feature.
For the next several examples, we will switch to using the FRED database API’s. These API’s are available form the Federal Reserve Bank of St. Louis. (You can register and get an API key using this link.)
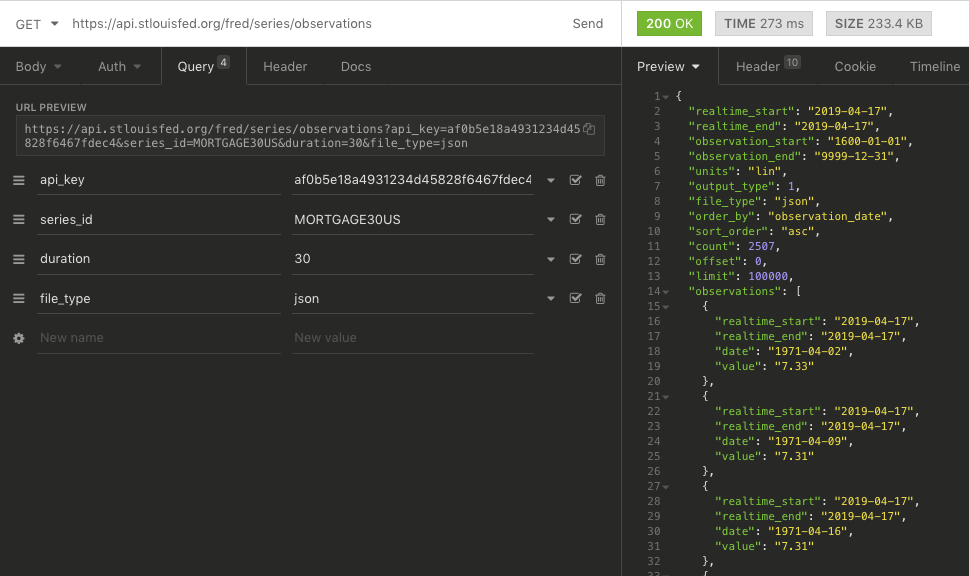
For our first API call, we will be getting the historic interest rate data for the US 30-year mortgage. Our full API will be:
https://api.stlouisfed.org/fred/series/observations?api_key=af0b5e18a4931234d45828f6467fdec4&series_id=MORTGAGE30US&duration=30&file_type=json
NOTE: This is a made up API key. If you register and get your own API key, you will get a similar 32-character API key.
Running the request gives us the following result:
We can also add a similar request for 15-year mortgages. For adding this, we will use the duplicate feature (as mentioned earlier in this post, you can access it by hovering over the name of a request in the left column). A dropdown arrow will appear on the right and clicking it will reveal a list of choices:
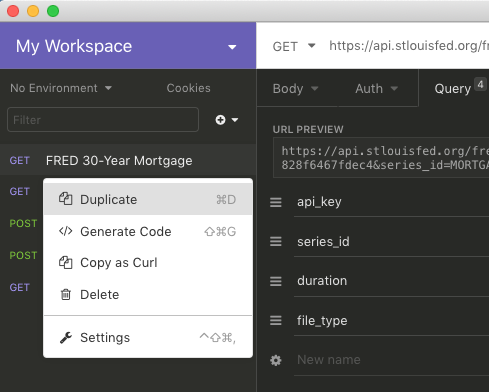
Initially, clicking “Duplicate” will name the new request “FRED 30-Year Mortgage (copy)”. You can rename this by simply double-clicking it. I will just change the 30 to 15. Within this API, the only 2 things that will be changing will be in the query params. The base URL will be the same, along with the API key. This is where variables come in handy.
To start using variables, we first need to setup an environment or use the base environment. You can use as many environments as you’d like within a single workspace. To keep things simple, we will use the base environment. Any variables added to the base environment will always be available throughout your workspace.
Access environment vaiables can be done by clicking the dropdown arrow next to “No Environment”. (Our text says “No Environment” because we have not setup an environment)
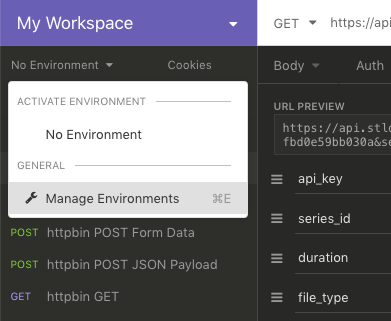
Since we’re using only the base environment, we can simply add our info to the empty JSON object that appears in the Environments window.

At this point, we can go back and modify our saved requests to use the variables we’ve just created. We will change the 30-year mortgage API first. These variables can be used in multiple places including the URL for the request and the query parameters:
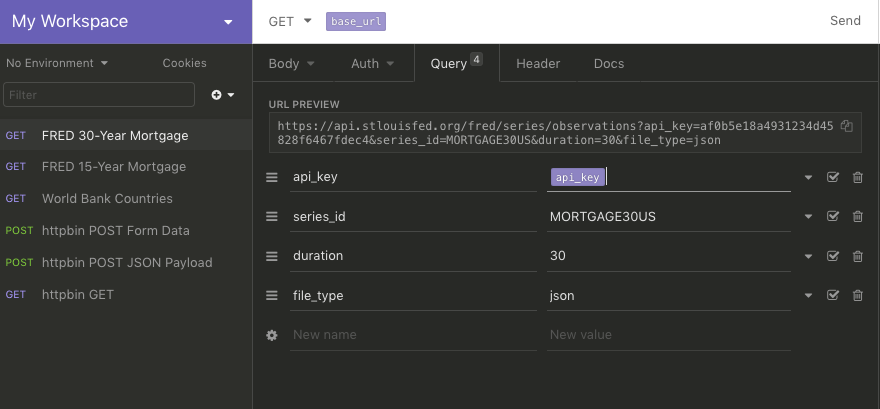
Running the request should produce the same result as before, grabbing the historic interest rate data. We can also make the same changes to the 15-year mortgage API. Another import advantage to setting these up is that if one of these changes (i.e. we get a new API key), we will only have to apply the change in one place and all of our requests will be updated.
Exporting Requests and Generating Code
Insomina offers several nice options for exporing requests. You can generate CURL commands to run using the command line. You can also generate language-specific code for executing requests. Beyond generating code for individual requests, you can also export your entire workspace, which we’ll also cover in this section.
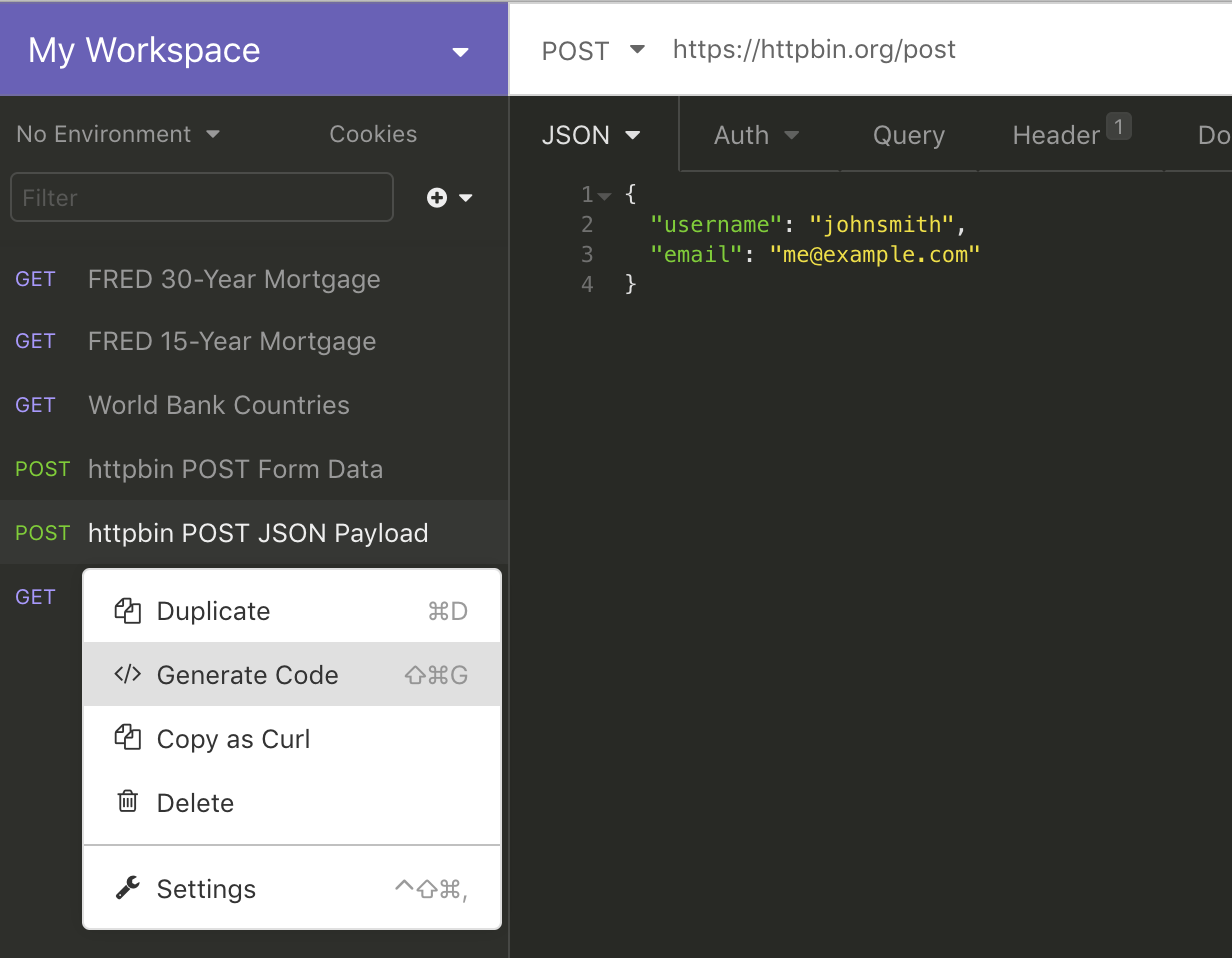
Copying as a CURL command is very easy. Simply click the down arrow next to the request in the left column. You will see a “Copy as CURL” option. Clicking this will automatically copy it to your clipboard. For this demo, I will use the Post JSON payload request from earlier. Since it’s hard to remember CURL syntax beyond a simple GET request (not to mention having to avoid typos), this makes things much easier.
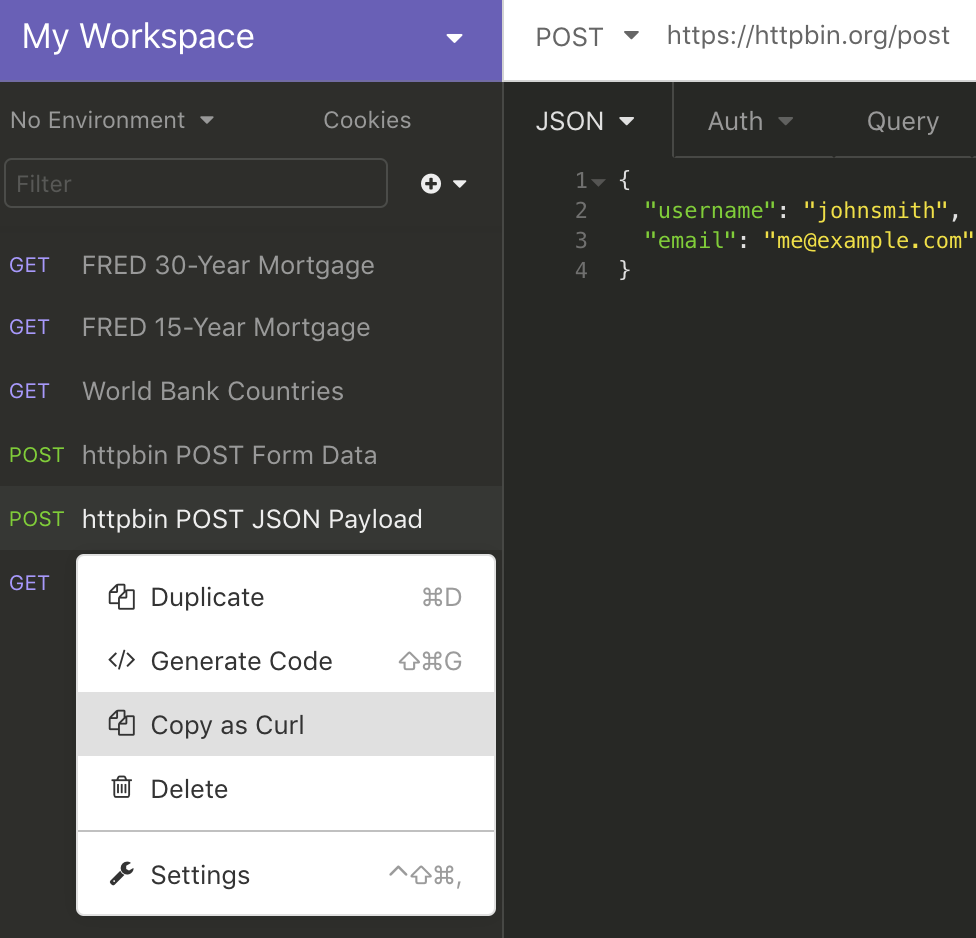
Pasting the CURL command will provide the following output:
curl --request POST \
  --url https://httpbin.org/post \
  --header 'content-type: application/json' \
  --data '{
	"username": "johnsmith",
	"email": "me@example.com"
}'
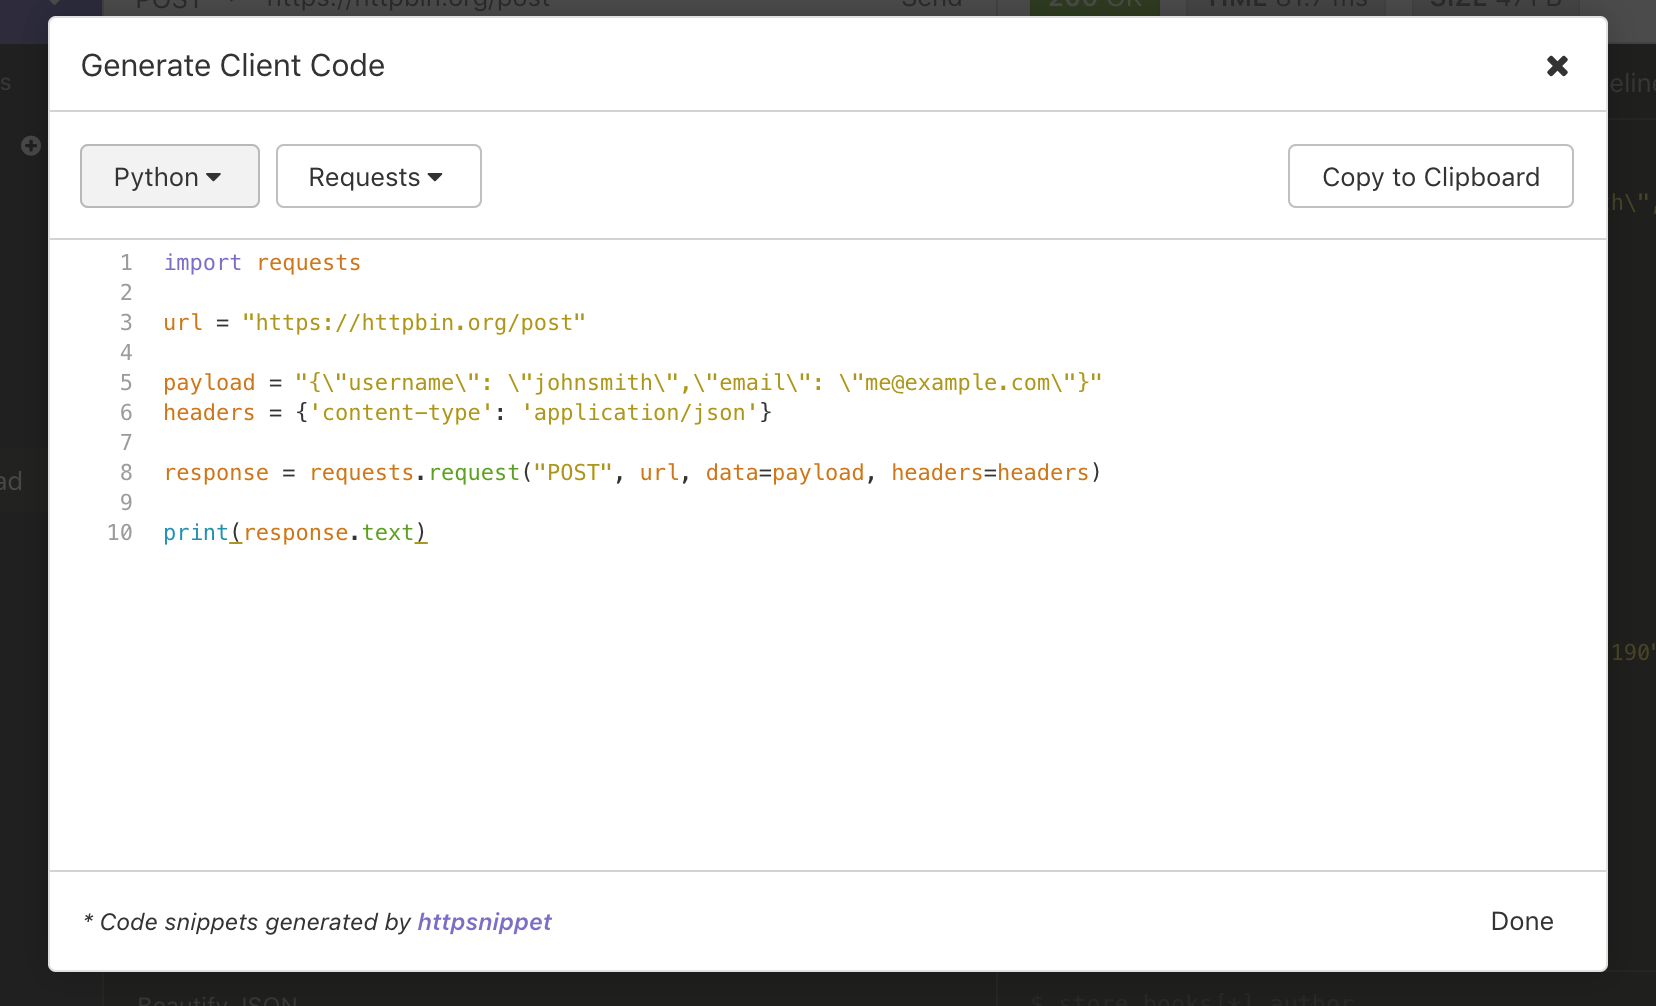
Generating language-specific code can be done just as easily. Simply select “Generate Code” instead of “Copy as CURL”. A modal window will appear. In one dropdown, you can select your programming language. If there is more than 1 popular method of sending requests, you will have different options. For example, if your using Python’s popular requests library, that will be one of the options:
Exporting a Workspace
There are multiple cases in which you’d want to export a workspace. You may want to share your workspace with someone else. Or, you may switch between machines such as your desktop and laptop, work and home computers, and so on. My most common case is the latter in which I keep exports of workspaces synched within a Dropbox folder.
Before we dive in, it’s important to note that there are more robust sharing/collaborating features available in the paid “Plus” version. Since we’re evaluating the free version, we won’t be covering any premium features. You can find more info regarding the Plus version here: https://insomnia.rest/pricing/.
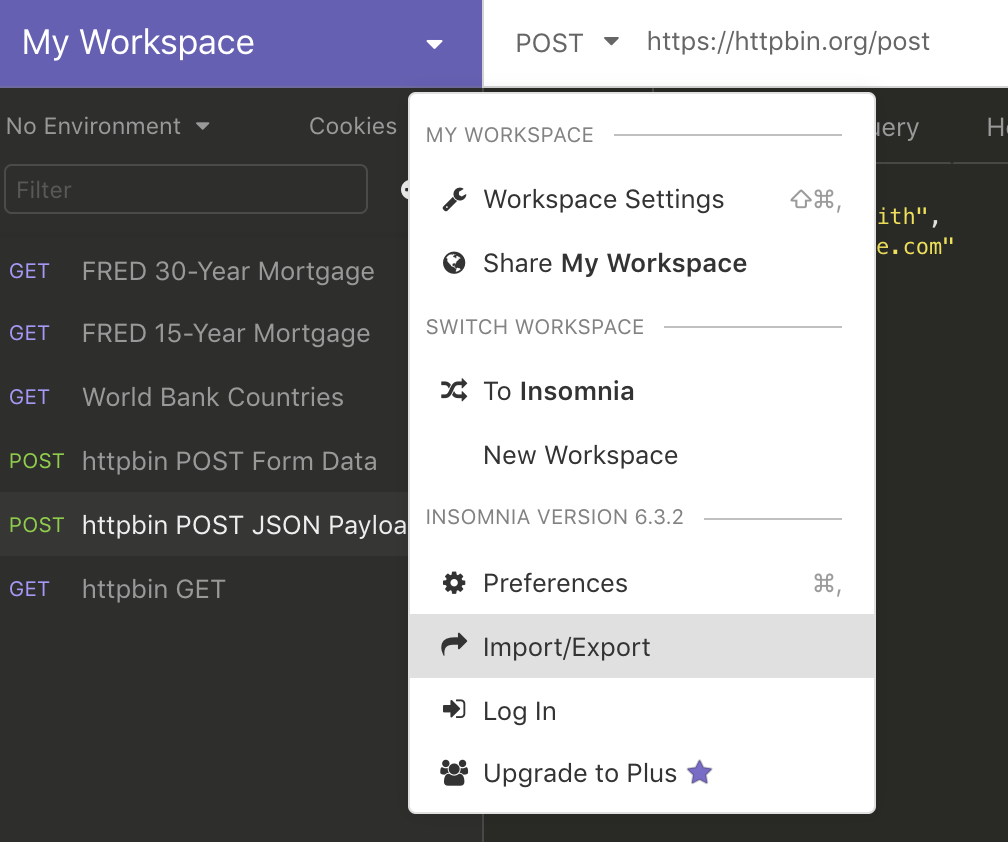
We can export our current workspace by selecting the dropdown next to the workspace name at the top-left, then selecting “Import/Export”:
A modal window will appear. Click the “Export Data” dropdown followed by “Current Workspace”.
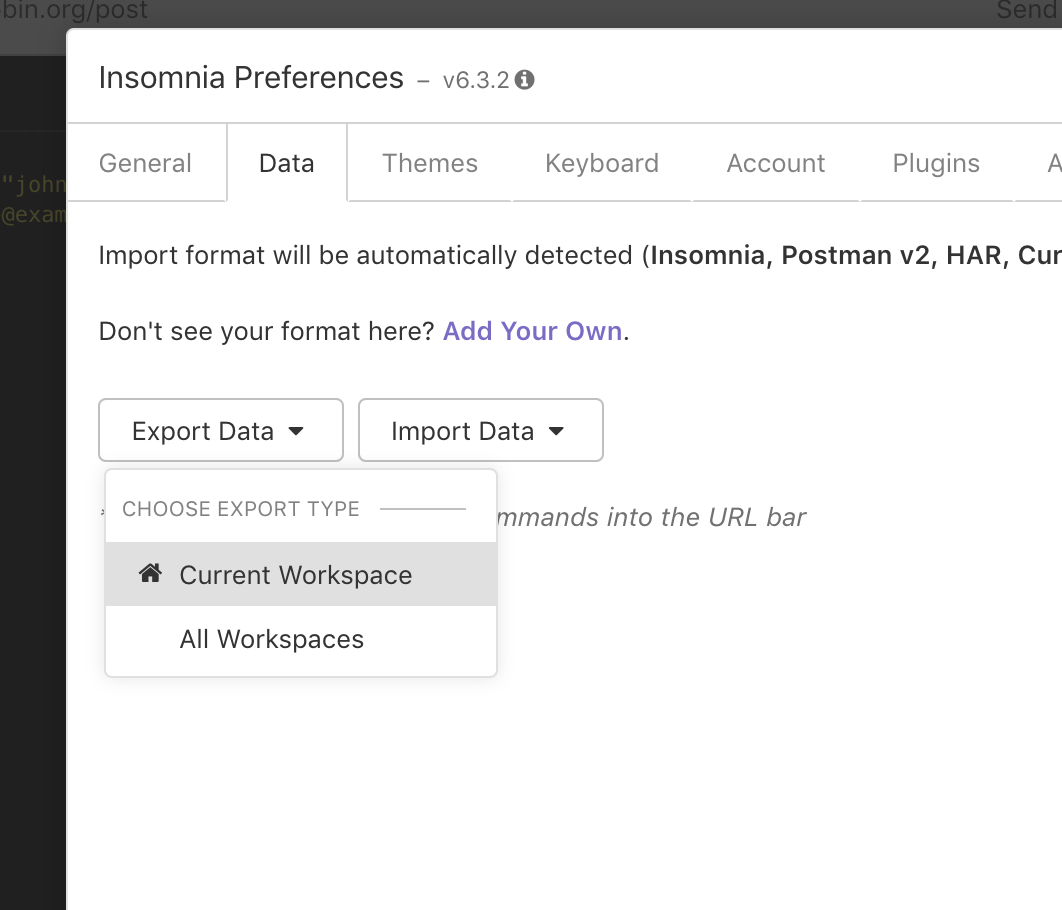
You will have 2 options: the Insomnia file type which can be imported into another Insomnia client. Or, a HTTP Archive Format (HAR) which is a more standard document type. Click “Done” will lead you to a Save As menu in which you can choose your storage location as well as a file name.
In this post, we’ve covered some of the best features Insomnia REST Client offers. Although there other popular options available, this one is among the most versatile and has many great features when it comes to using variables, generating client code, and exporting/sharing workspaces.
Posted in other