AWS Create New User
As a best practice, it’s best to manage user accounts within AWS that are restricted to only the services they need. This is especially the case for accounts that are not actually human users, but may be for a specific application (known within AWS as “programmatic access”). An example being an application that needs to access an S3 bucket.
As a bonus, Amazon will not charge for only additional IAM users. But rather, the only charges will be for whatever other resources the user will use.
Upon login, navigate to the IAM console as shown below.
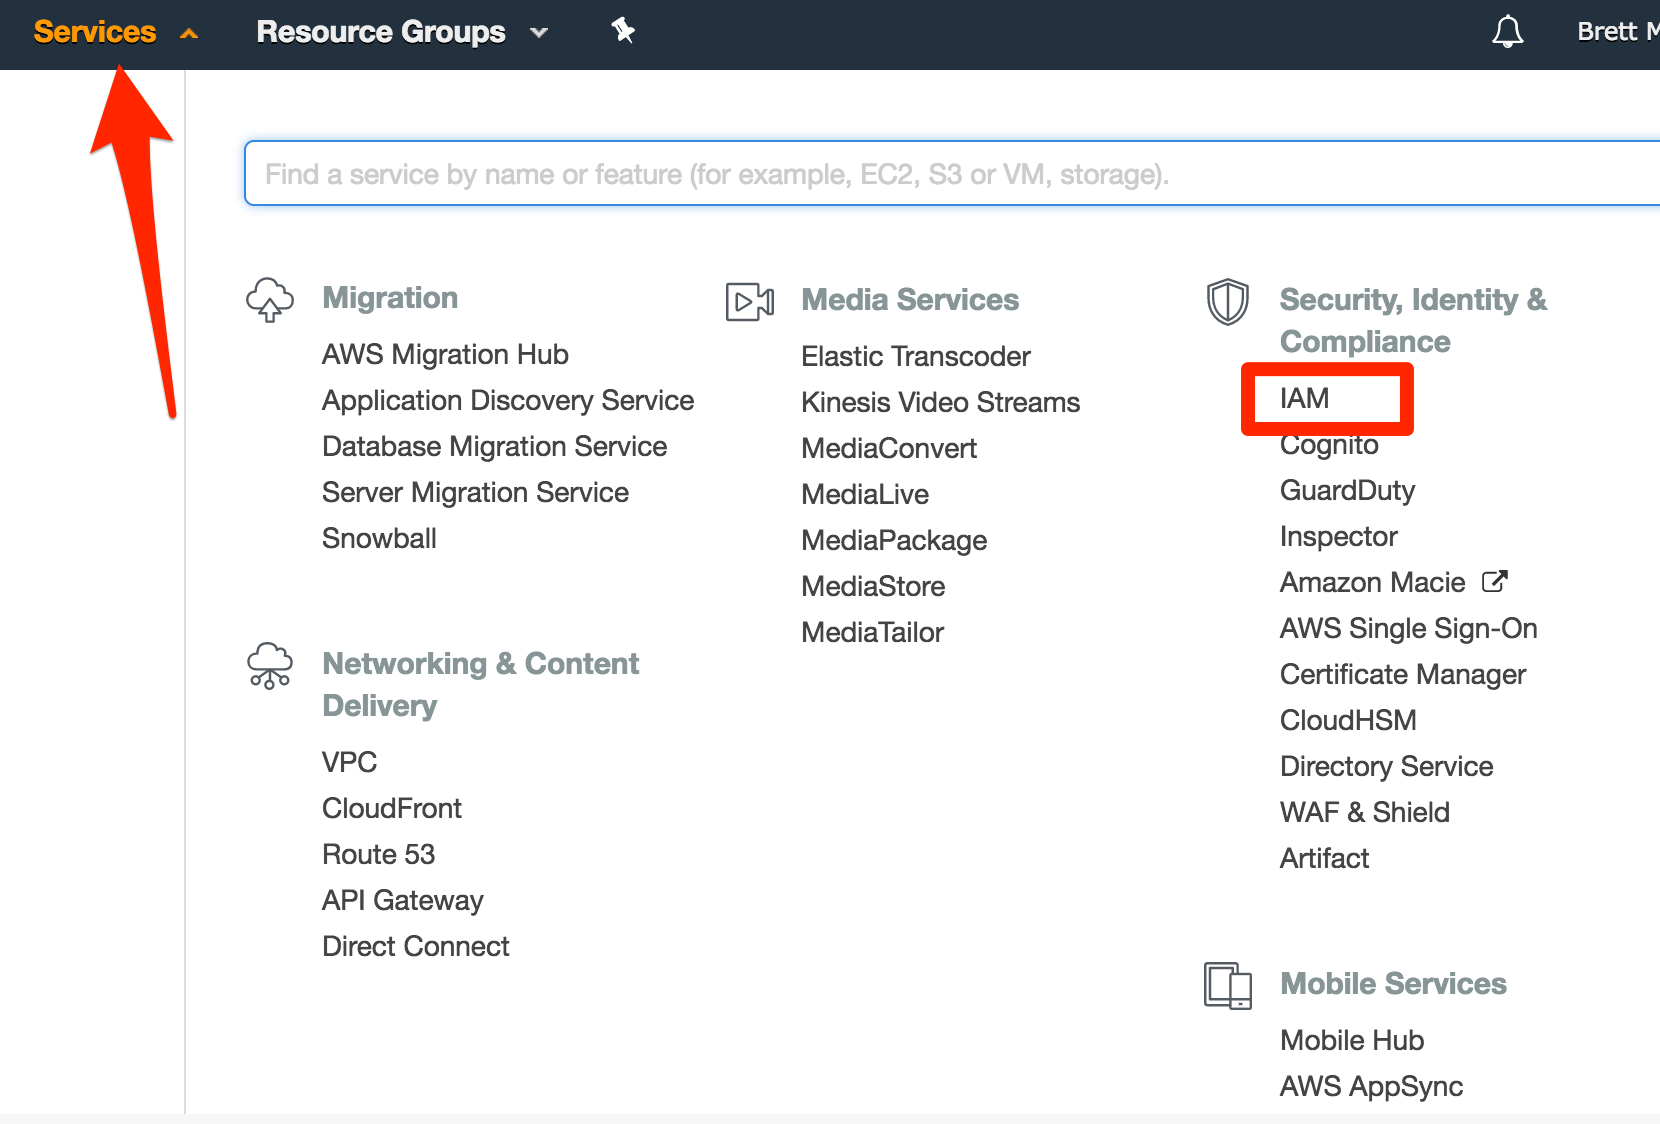
Next, you will be taken to a welcome page. There will be a security status in which you’ll be guided through a series of steps. Another best practice is to not use root access keys. Instead, it’s best to create keys with specific user accounts, which will only have access to the services they need. The root account, on the other hand, will have access to everything. Since the scope of this tutorial is for creating a new user account, we will only focus on that.
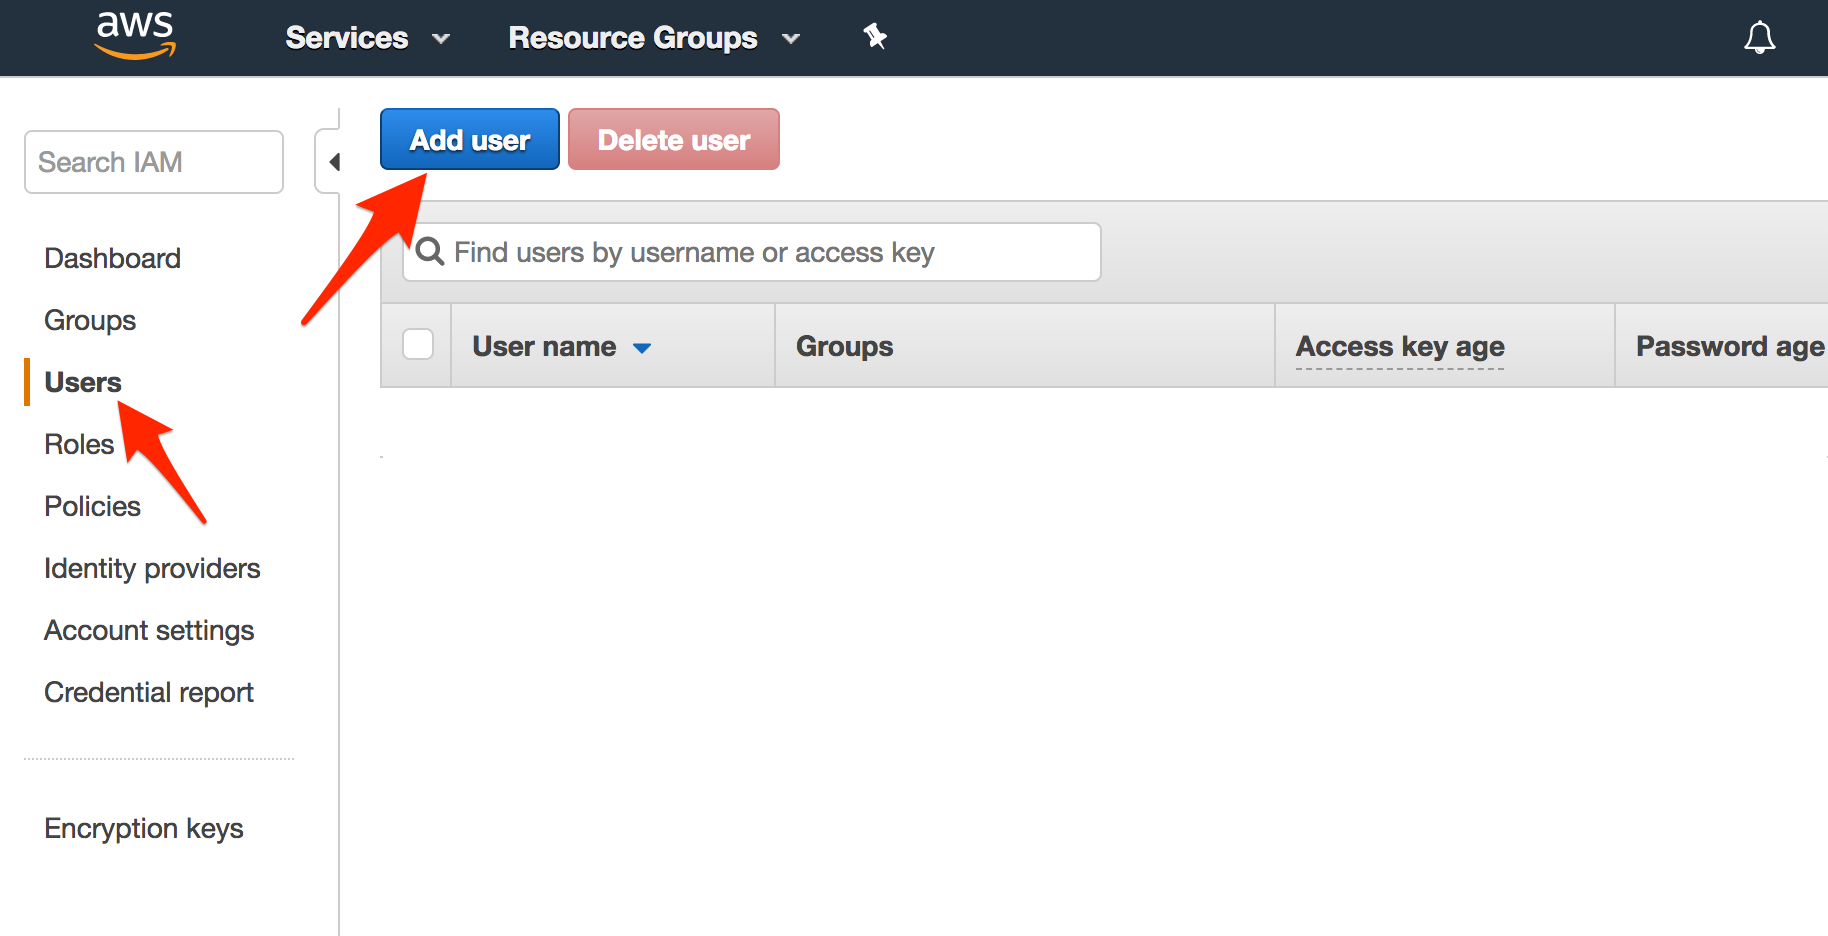
On the left nav, click “Users”. You will be taken to a page in which you can add a new user.
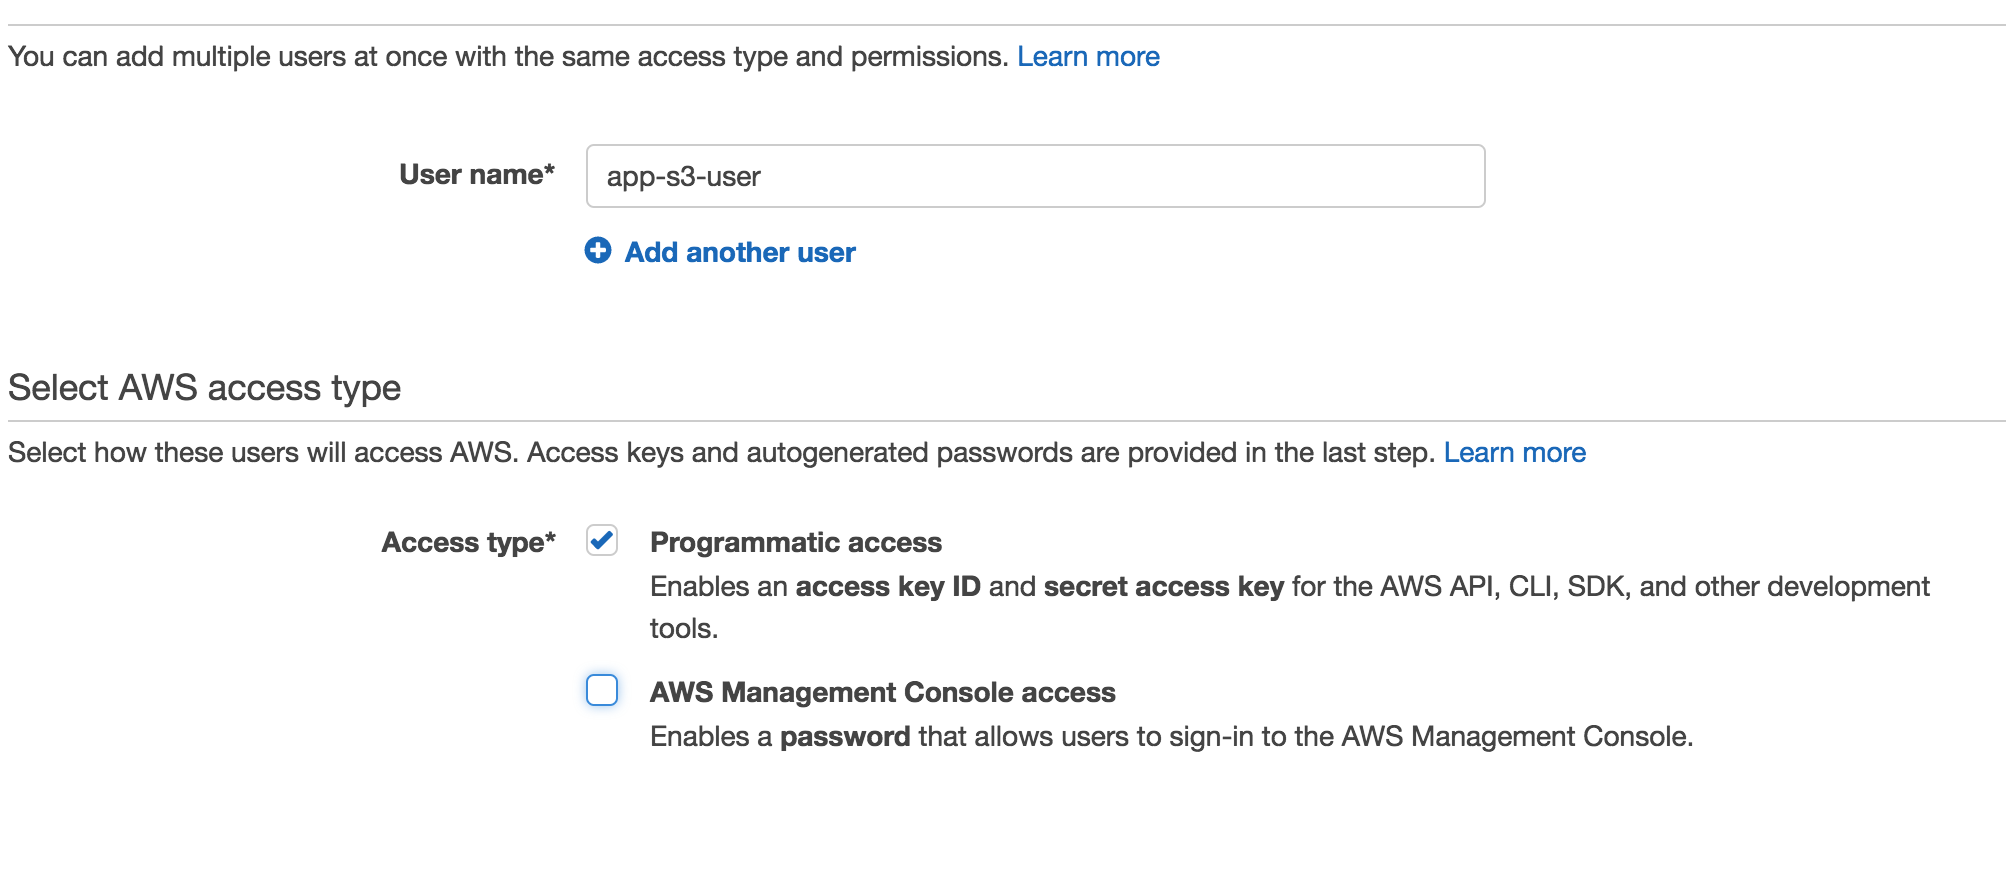
On the next page, we need to enter a username and set an access type. For this demonstration, I’m going to add the user app-s3-user and select “Programmatic Access”. We can grant the user account both programmatic access and access to the AWS Management Console. Since this user account will only be needed to access an S3 bucket, we will only be checking “Programmatic access”.
 Click the
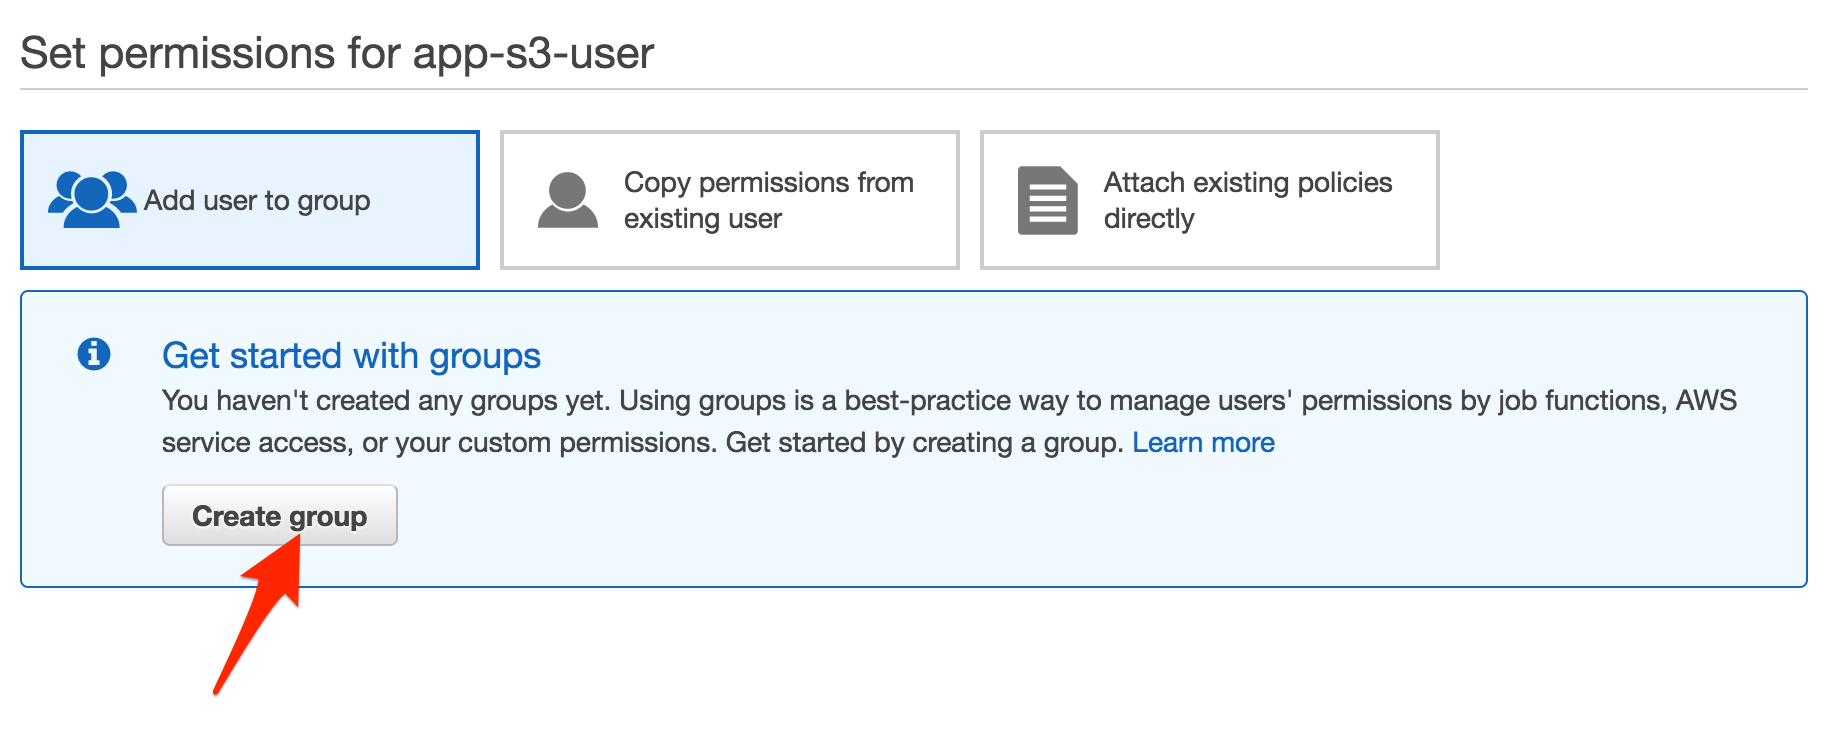
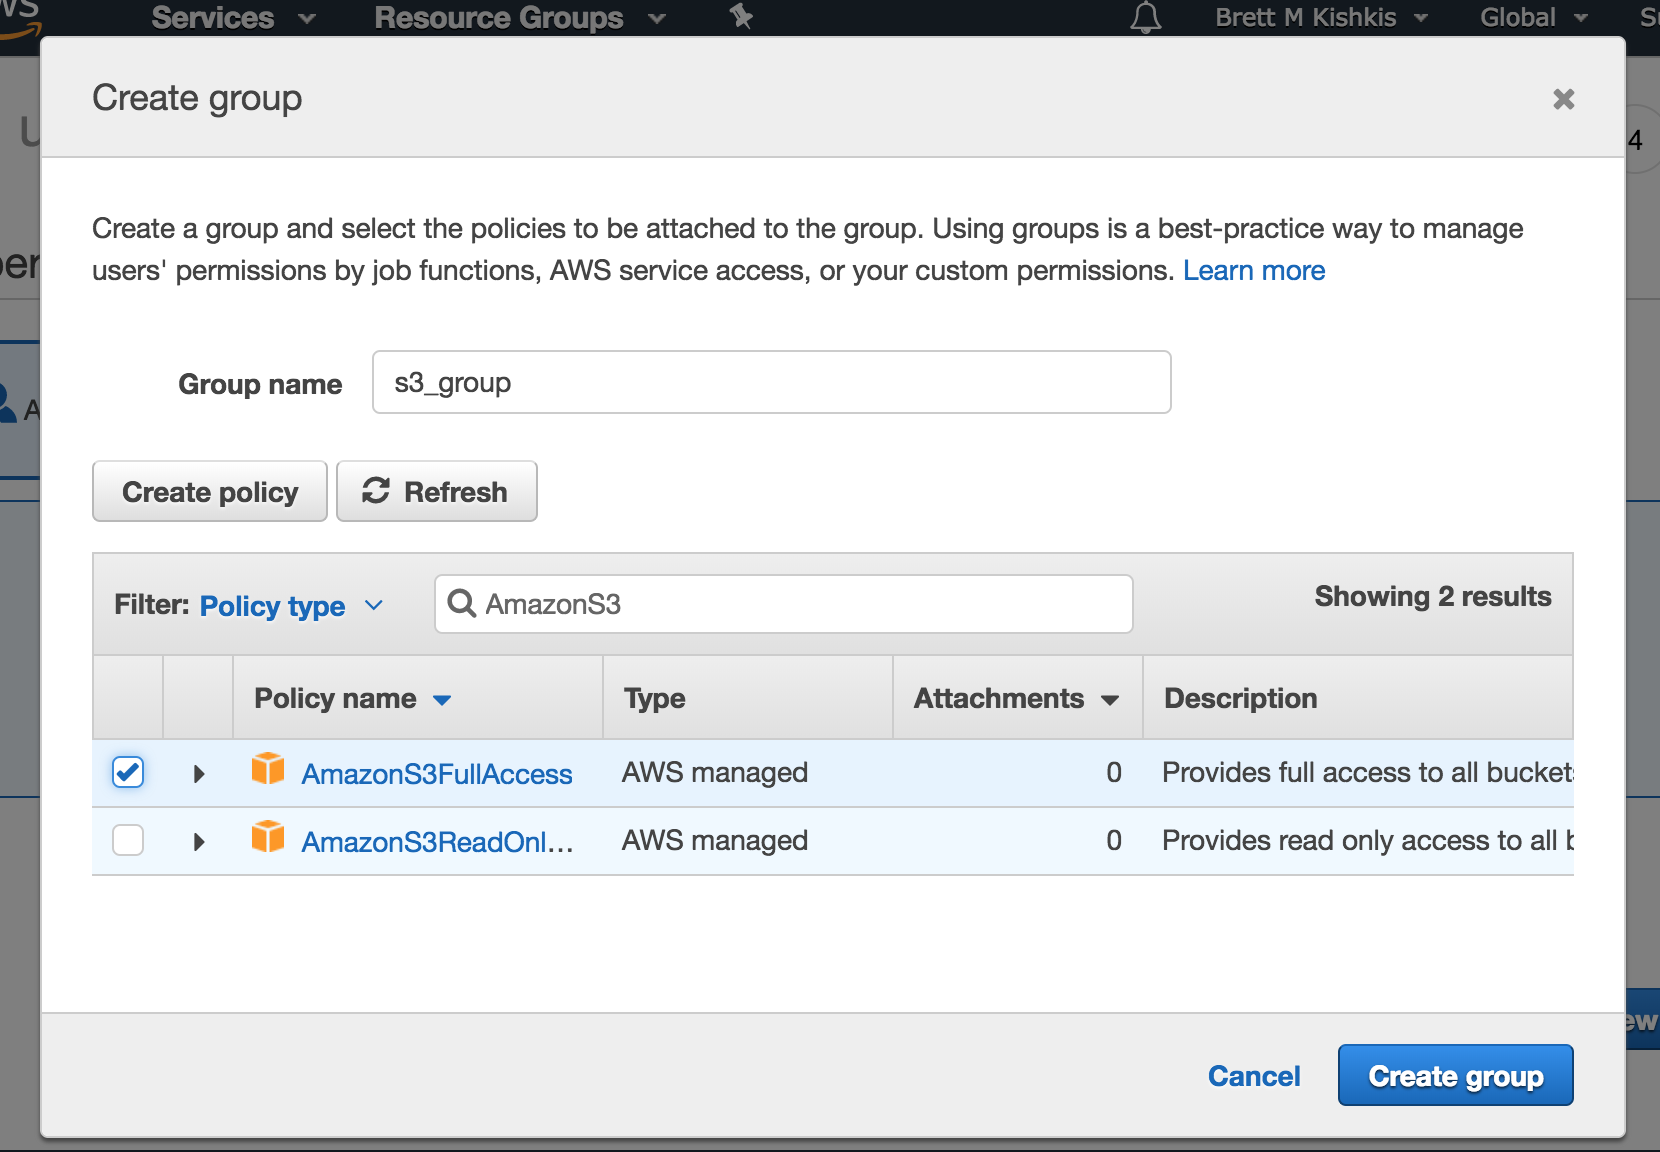
 Next button to go to the permissions page. This step entails a few options for configuring permissions for our new user. We’re going to create a new group since we don’t have any groups configured. Click Create Group.
On the next page, the list of policies will be a bit overwhelming. Fortunately, we can filter using a text search. Type in AmazonS3. To make this simple and straightforward, check the policy that reads “AmazonS3FullAccess”. Any users in this group will have access to all S3 Buckets and their contents. As a best practice, you will want to grant each user “least privilege”. That is, you don’t want to grant access to anything beyond what they will need. Click Create Group.
After creating the group, you should be returned to the user permissions page with our newly created group checked by default:
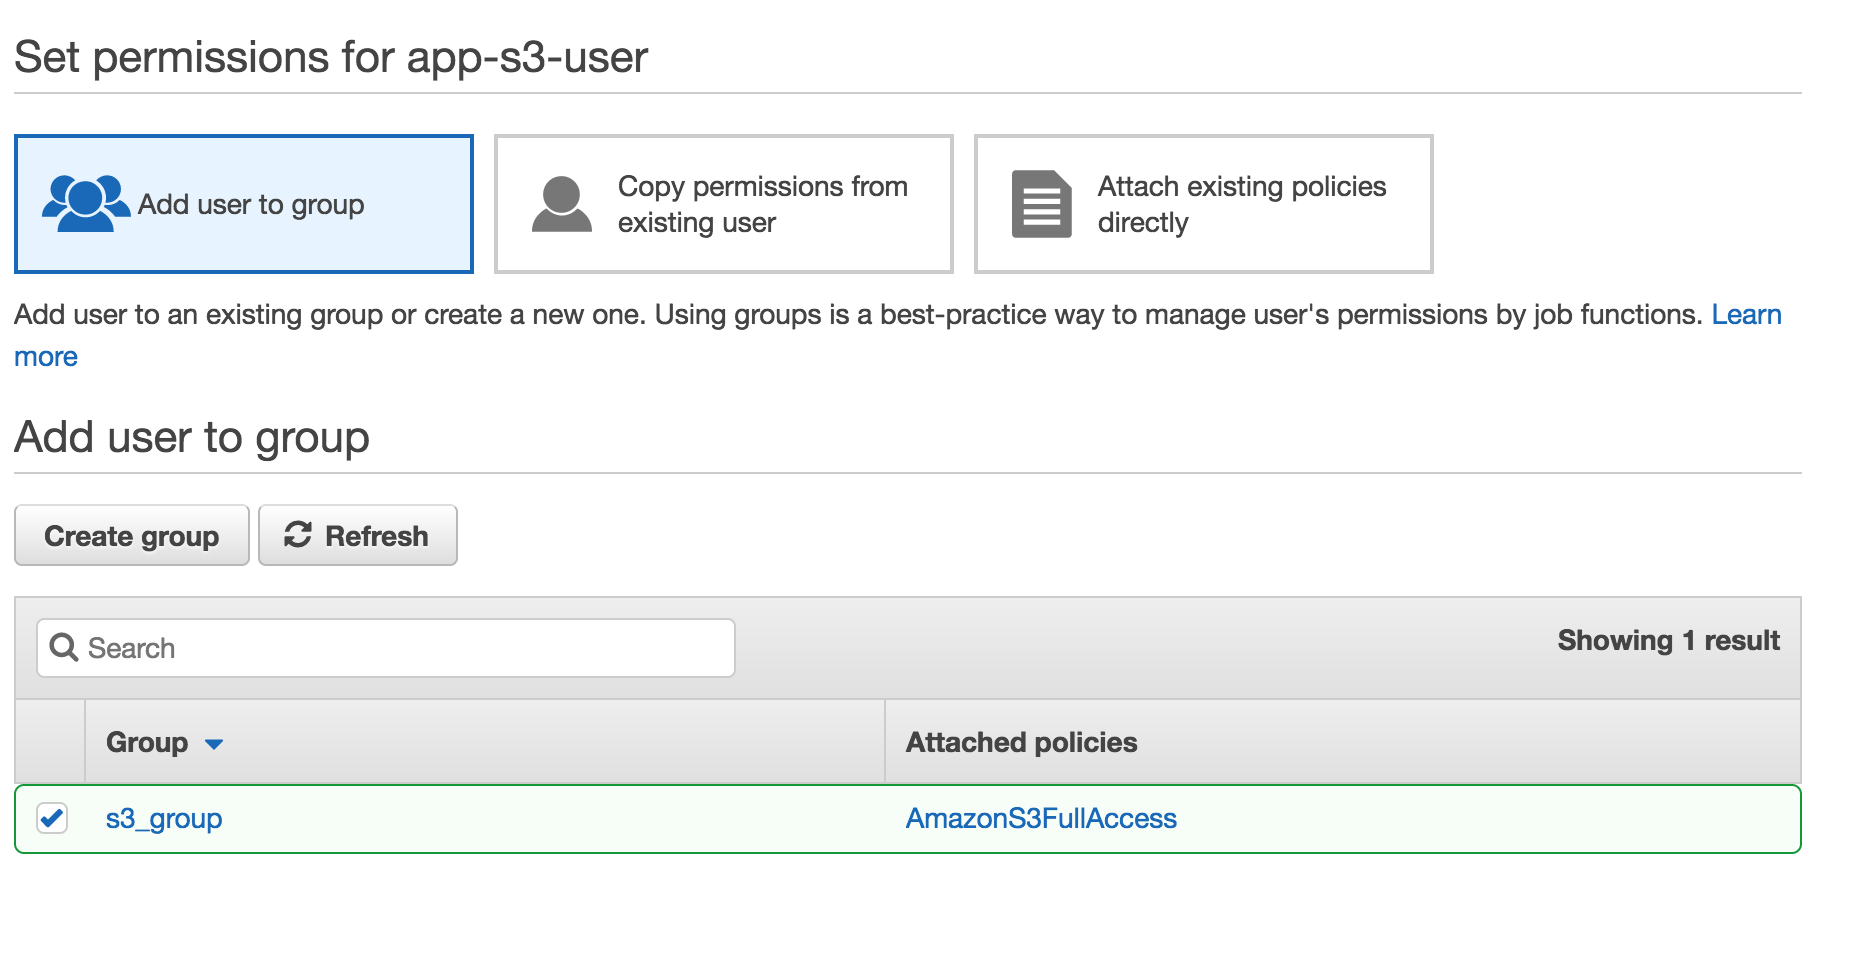 Scroll to the very bottom of the page. You should see a button labeled
 Next: Review. Click this to continue.
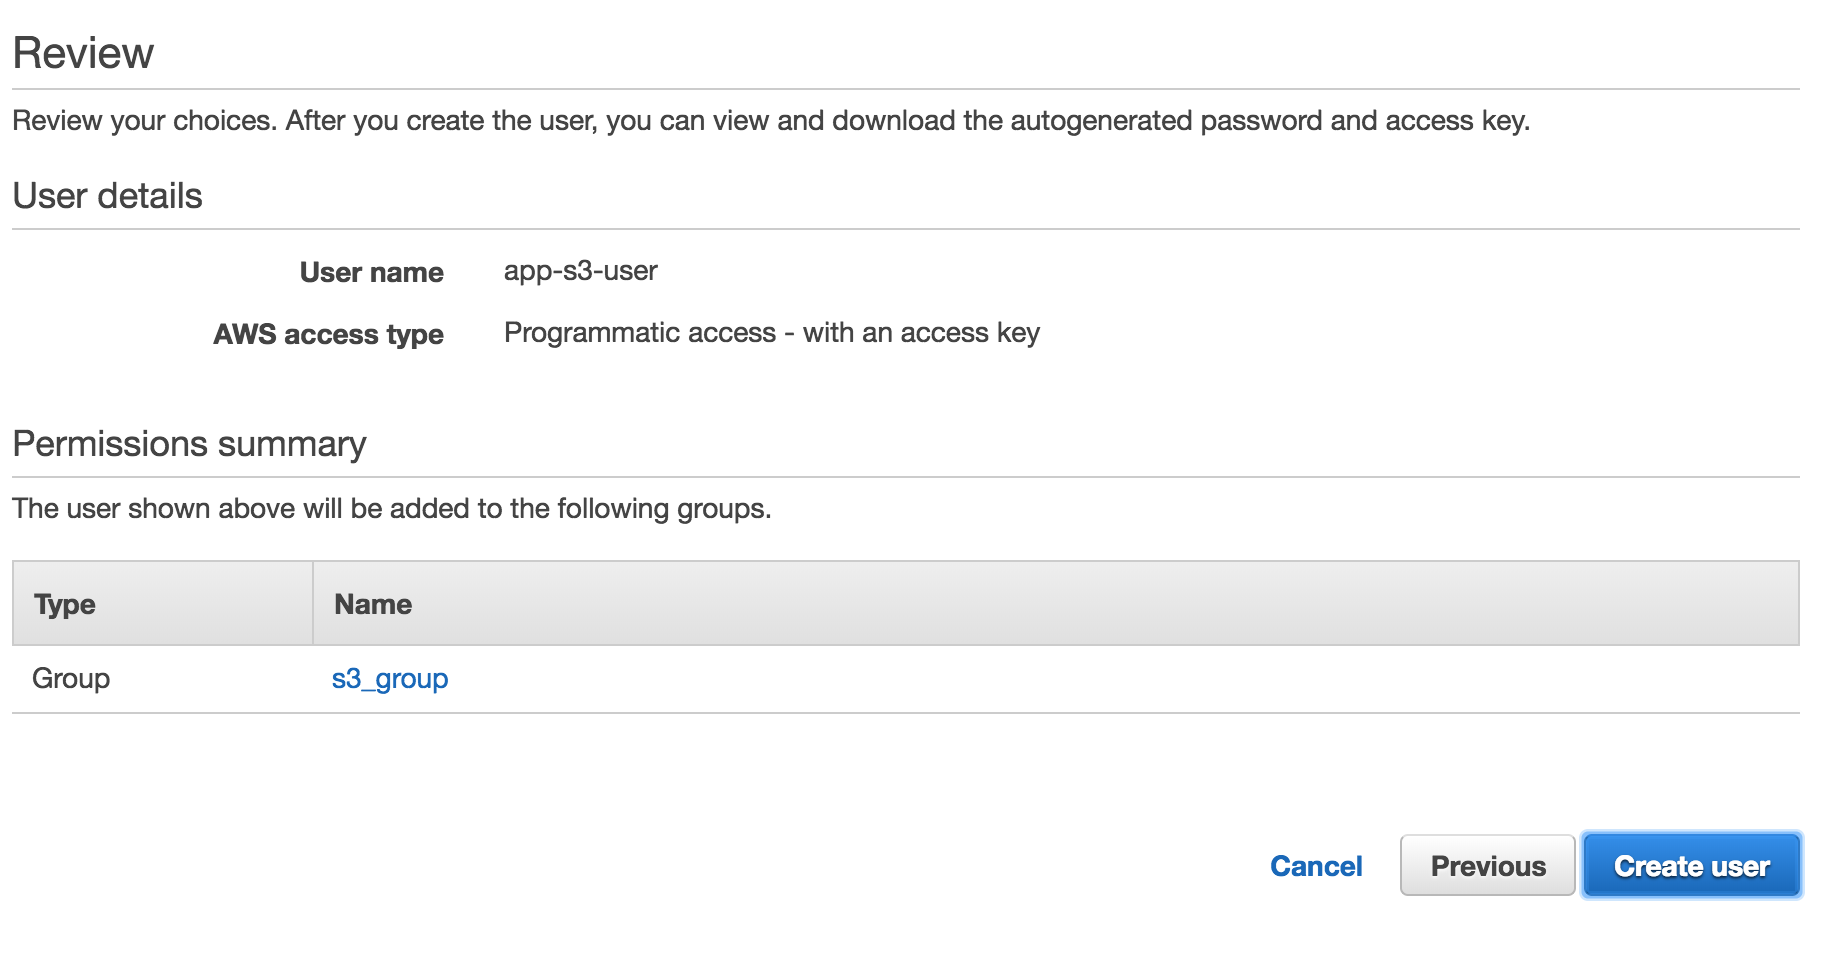 Finally, after clicking
 Create user, you should see a page confirming the user was created. It is on this page where you will get your AWS Access Key ID and your AWS Secret Key. You will want to either download the credentials CSV file or copy them from the browser. Copy them to a safe place. You will need them later when setting up the AWS CLI on your machine or for setting up your app’s environment variables.
More on AWS Identity and Access Management (IAM).
Posted in aws